
English
Views: 222 Author: Farwise Lighting Publish Time: 2026-11-17 Origin: Site


Content Menu
● Where to Use Outdoor LED Strip Lights in a Garden
>> Use strip lighting to reveal paths and steps, not just trace them
>> Hide the LEDs around benches, planters, and patio furniture
● How to Choose Waterproof LED Strip Lights for Your Garden
>> Match the entire assembly to the exposure
>> Choose controls based on how people use the garden
● How to Install Outdoor LED Strip Lights: From Layout to Night Test
>> Diagnose problems before replacing the strip
● Review Water Exposure and Repair Access Before Closing the Build
● Aim Garden Strip Lighting Where It's Needed and Set a Shutoff Time
● Plan Your Garden Lighting Project With Farwise
>> 1.Can outdoor LED strip lights stay outside year-round?
>> 2.Can I cut waterproof LED strip lights to fit a planter?
>> 3.Can I mount garden LED strips with adhesive alone?
>> 4.Can I put outdoor LED strip lights underwater in a pond?
>> 5.Why are my outdoor LED strip lights dimmer at one end?
>> 6.Should I leave garden strip lights on all night?
Outdoor LED strip lights work best in a garden when you can see what they illuminate without looking directly at the LEDs. Mount them under a stair lip to reveal the tread, beneath a bench to cast light onto the patio, or behind a planter edge to bring out its shape. Before you buy, decide what each strip should illuminate, how much water the installation will face, and how you'll reach the connections if something needs replacing.
Farwise Technology Co., Ltd. has spent 16 years manufacturing LED lighting, with a focus on integrated furniture lighting and OEM/ODM customization. The same design principle that makes lighting work inside a cabinet or beneath a vanity applies to garden benches and built-in planters: plan the mounting, wiring, and service access together before the structure is finished. Outdoors, drainage and exposure make those details even more important.

Start with the route people actually walk after dark. Then choose a place to sit and a feature worth highlighting. You don't need to outline every edge. A garden is easier to read when the lighting distinguishes a change in level, a destination, and a decorative feature.
| Garden area | Where to mount the strip | What to check after dark |
|---|---|---|
| Pathway | Under a raised border or along a low wall, aimed at the walking surface | Turns, edges, and changes in surface are easy to distinguish |
| Deck steps | Behind a suitable stair lip or under a protected ledge, aimed at the tread | Each step is visible from above and below without glare |
| Raised bed | Beneath the planter cap, washing light down the outside face | The planter is defined without lighting the entire bed |
| Bench or patio seating | Beneath the seat or behind a recessed trim edge | Seated guests can't see the bare LEDs across the patio |
| Fountain or pond edge | On a separate, suitably protected nearby structure, aimed toward the surround | Reflections don't obscure the edge, and equipment stays out of water unless approved for immersion |
| Vertical garden | Beneath a rigid frame or shelf, clear of irrigation spray and plant growth | The foliage is visible without light spilling above the wall |
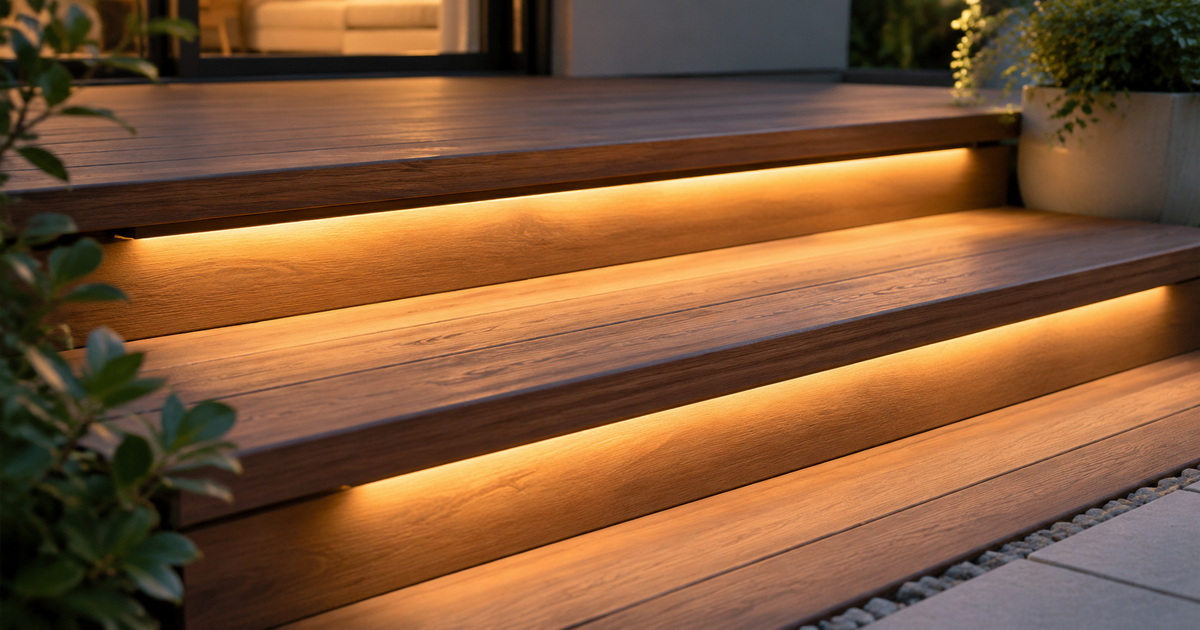
An illuminated line beside a path can help visitors follow it, but the line itself doesn't necessarily reveal uneven paving. Aim the light at the surface people step on. For stairs, walk the route in both directions: a strip hidden from someone descending may shine directly into the eyes of someone approaching from below.
If a strip leaves dark patches on the treads or creates glare you can't shield, use a dedicated step or path fixture. For commercial projects, don't assume decorative lighting satisfies required stair or exit-route illumination.
An under-bench strip usually looks better when it lights the paving rather than the opposite seat. Before fixing the channel, sit where guests will sit. If you can see the LEDs, move the strip farther behind the edge or use a mounting detail that blocks the direct view. A diffuser can soften visible dots, but it won't correct a strip aimed at eye level.
For raised beds, mount to a stable planter edge rather than loose soil or a growing plant. Near a pond, try lighting the surrounding stonework first. You may get the reflection you want without putting equipment in the water.
Ingress protection describes how an enclosure resists the entry of solids and water under specified test conditions. It's a useful starting point, not blanket permission to put a strip wherever it will fit. An installation under a covered bench, one repeatedly hit by sprinklers, and one submerged in a fountain face different conditions.
Check the complete assembly: the strip, factory leads, end caps, connectors, controller, driver, and any enclosures. A protected strip body doesn't make its connections suitable for the same location. If a run passes through more than one exposure zone, review each component where it will actually sit. Near water, distinguish between a strip mounted above the waterline and equipment explicitly approved for submersion under the intended conditions.
For a garden used mainly for dining and walking, warm white is a practical starting point. Put path and step lighting on a separate control from decorative strips so visitors can still see the route after the patio accents switch off. If you want color-changing lighting for events, keep it on the accent circuit rather than relying on changing colors to mark steps.
For longer routes, ask the supplier to review the run layout and component compatibility before ordering. A far end that appears dimmer than the beginning can indicate voltage drop, meaning less voltage reaches the LEDs farther along the run. The right response is to review the approved layout, not simply turn up the brightness.
1. Map the runs and service points. Draw the path, steps, seating, and planters. Mark where each strip starts and ends, where the driver and controller will be accessible, and where irrigation, runoff, or maintenance tools could reach the assembly.
2. Inspect the route after watering. Look below caps, behind benches, and along channels. Surfaces that appear sheltered in dry weather can collect runoff. Move connections away from places where water pools rather than trying to solve a drainage problem with sealant.
3. Mock up a representative section. Before repeating a detail along a whole path, test it on the actual paving or wall finish. Check the result standing, walking, and sitting. This is the time to move the strip, not after all the channels are fixed.
4. Mount and terminate as instructed. Use the mounting method approved for the strip and surface. Don't rely on adhesive alone unless the manufacturer approves it for that application. Cut only if the model permits field cutting, and use the specified termination method. Ask whether cutting changes the stated protection; adding sealant doesn't automatically restore it.
5. Verify the finished installation. Follow the manufacturer's instructions for testing and commissioning. Have a qualified electrician handle permanent mains wiring and assess local electrical requirements near water. After dark, check for glare, skipped steps, uneven brightness, and light spilling beyond the intended area.
If the far end is dim but the first section looks normal, ask the installer to check the run layout and connections. If a section flickers after rain, switch it off and have the terminations and enclosures inspected before using it again. If a strip is peeling away, check the condition of the mounting surface and whether the mounting method was approved for that substrate. Replacing the strip without correcting the underlying problem may leave you with the same failure.
A useful handover question is: What would someone have to remove to replace this strip? A connector behind a removable bench panel is easier to reach than one trapped behind fixed cladding. Likewise, a separately replaceable bench run can spare you from dismantling a neighboring planter just to trace a fault.
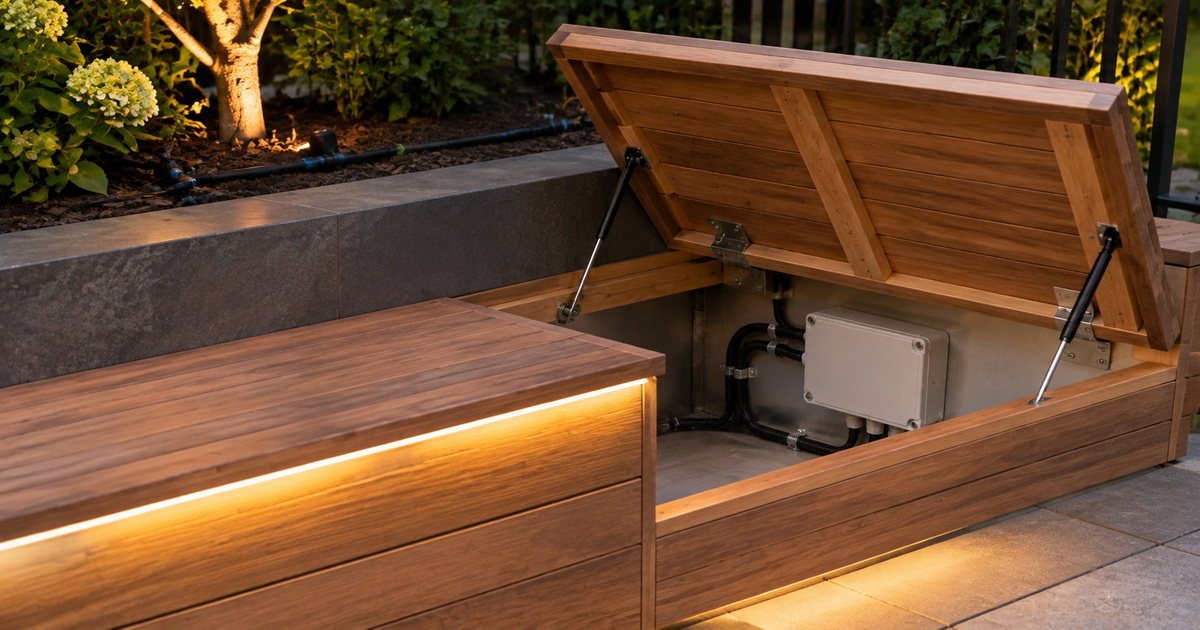
Consider a courtyard with a long planter, a built-in bench, and a short set of steps. One continuous strip might look tidy on the drawing, but each area has a different job and exposure. The planter is near irrigation, the bench needs glare control from seated positions, and the steps need reliable visibility even when the decorative lights are off. Treating them as separate runs lets the installer place connections where they can be serviced and test each lighting effect on its own.
For repeat installations, record the run locations, compatible replacement components, and access points. If the design calls for custom lengths or cable exits, agree on those details before production and review a sample before approving the full order.
Use a nighttime walk-through to judge what the garden looks like from the gate, seating area, windows, and property boundary. Look for light reflected off pale paving or water, as well as direct glare. Shielding or moving a strip often solves a problem that dimming alone won't fix. Once the light lands where you want it, dim it to the lowest level that still does the job.
Set decorative lighting to switch off when the garden is no longer in use. Where appropriate, give routes separate controls so people can still navigate them when they need to. Warm light is a useful choice where it fits the design, but color won't prevent a poorly aimed or unnecessarily bright strip from spilling into planting beds or neighboring windows.
If you're specifying strip lighting for built-in patio furniture, a landscape feature, or a repeat installation, send Farwise Technology Co., Ltd. your layout, mounting details, exposure conditions, and desired controls. Request an OEM/ODM feasibility review covering custom lengths, cable exits, appearance, and service access. Before ordering, ask for confirmation that the proposed assembly suits each intended location and whether any field modifications would change its suitability.
Yes, if the complete assembly is intended for the site's exposure and installed according to its instructions. Inspect mounts, cable entries, and seals after severe weather or nearby maintenance. Don't assume a sheltered product is suitable for an exposed garden bed.
Only if the manufacturer permits it for that model. Use the designated cut points and specified termination method, then confirm what protection applies after modification. If the required protection can't be verified after cutting, request a factory-terminated length.
Only where the manufacturer approves adhesive-only mounting for the surface and exposure. Rough masonry, damp timber, and dirty or uneven surfaces are poor candidates for a simple peel-and-stick approach. Use compatible channels or clips when specified.
Only use lighting equipment explicitly approved for submersion in the intended application and installed in accordance with local electrical requirements. An outdoor or splash-resistant label isn't enough. If you only want to highlight the water, consider lighting the surround from a protected position instead.
Voltage drop is one possible cause, particularly on a long run. Have the installer check the layout, supply, connections, and manufacturer's run limits before replacing components or changing the wiring.
Usually not for decorative lighting. Use a timer to switch accents off after use. If a route needs to be visible later, control it separately and use only as much light as the task requires.
1. - [LEDYi Lighting — "How to Use Outdoor LED Strip Lights in Your Garden?"] — Martin Wan, updated February 26, 2025. Original article reviewed for garden applications, installation sequence, and common faults. [ledyilighting]
2. - [UL Solutions — "Landscape and Outdoor Luminaire Lighting"] — Technical background on outdoor lighting systems, component evaluation, wet locations, and application-specific considerations near water. [ul]
3. - [Flexfire LEDs — "How to Install Outdoor LED Strip Lights"] — Manufacturer example illustrating why cutting, mounting, and sealing instructions are product-specific and why field modification can affect the original protection rating. [flexfireleds]
4. - [DarkSky International and the Illuminating Engineering Society — "Five Principles for Responsible Outdoor Lighting"] — Basis for shielding, targeting, dimming, scheduling, and choosing warmer light where appropriate. [darksky]
5. - [U.S. Department of Energy — "Next Steps: Five Principles for Responsible Outdoor Lighting"] — Additional context on outdoor visibility, reflected light, environmental effects, and limiting operating time. [energy]


