
English
Views: 222 Author: Farwise Lighting Publish Time: 2026-11-16 Origin: Site


Content Menu
● 12V vs. 24V LED Strip Lights at a Glance
● Why 24V LED Strip Lights Often Perform Better on Longer Runs
● When 12V LED Strip Lights Are the Better Choice
>> Short Shelves, Display Niches, and Drawer Lighting
>> Retrofits With an Existing 12V System
● When 24V LED Strip Lights Are the Better Choice
>> Continuous Kitchen Cabinet and Retail Display Lighting
>> Wardrobes and Furniture With Remote Drivers
● Brightness, Energy Use, and Dimming: What Voltage Does Not Tell You
● How to Specify and Validate an OEM Furniture Lighting System
>> 1. Draw the Lighting and the Wiring Separately
>> 2. Mock Up the Most Demanding Cabinet First
>> 3. Record the Approved Assembly Before Production
>> 1.Can I connect a 12V LED strip to a 24V power supply?
>> 2. Is there a universal maximum length for 12V or 24V LED strips?
>> 3.Is 12V or 24V better for under-cabinet lighting?
>> 4.Why is my LED strip dimmer at the far end?
>> 5.Can I cut both 12V and 24V LED strips to fit custom furniture?
>> 6.Can I use the same dimmer for 12V and 24V strips?
● Request a Lighting Layout Review From Farwise
● References and Editorial Notes
Choose 12V LED strip lights for short, independently powered furniture sections when their cut marks fit the available space or when you already have a compatible 12V system. Choose 24V LED strip lights as a starting point for longer runs, longer cable routes, or continuous lighting lines where uneven brightness would be noticeable. Neither voltage is inherently brighter or more energy-efficient. The right choice depends on the strip design, where power enters the system, and how the light looks once installed.
At Farwise Technology Co., Ltd., we approach this comparison from a furniture manufacturer's perspective: the strip, driver, controls, connectors, and mounting details need to work together. A strip that looks good on a workbench can still leave a dark gap at the end of a shelf, reflect individual LED dots on a countertop, or require a driver that becomes inaccessible once the cabinet is fitted. Those are the details worth resolving before production.
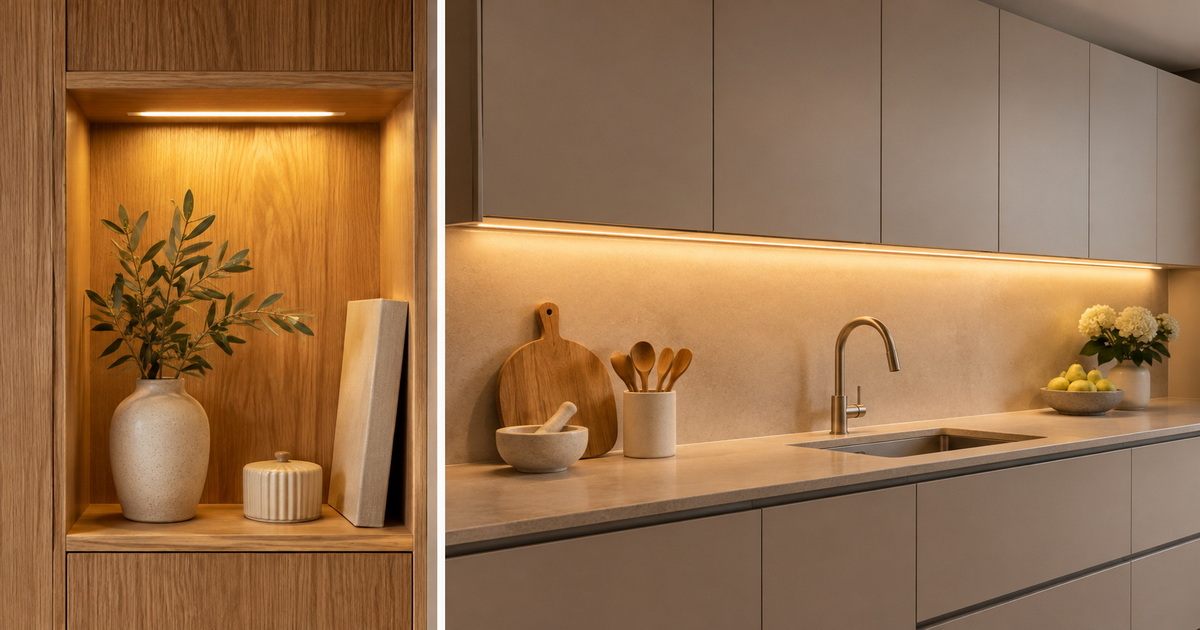
| Project consideration | When to start with 12V | When to start with 24V |
|---|---|---|
| Short shelves and display niches | The strip's cut marks fit the visible opening | The furniture already uses a compatible 24V platform |
| Continuous under-cabinet lighting | The layout uses short, separately fed sections | A long visible line needs consistent brightness |
| Driver placement | The driver can sit close to the lighting | The driver is remote and cable losses need closer attention |
| Retrofit projects | The existing 12V driver and controls are suitable | The project already uses 24V or allows a full system redesign |
| Furniture production | Cut flexibility and compact modules simplify assembly | A shared lighting platform serves longer or distributed zones |
Voltage drop is the loss of voltage as current travels through wiring, connectors, and the copper paths on a strip. When enough voltage is lost, the far end of a strip may look dimmer than the section near the feed. Depending on the strip design, the change may also show up as a shift in color.

At the same electrical power, a 24V strip draws half the current of a 12V strip. With the same cable resistance, the lower current produces less voltage drop along that cable. That makes 24V a useful starting point when the driver sits far from the furniture or when the lighting needs to run along a wide cabinet bank. It does not mean every 24V strip can support the same continuous run: the strip's construction, load, and approved feed arrangement still matter.
Separate two distances on the drawing: the cable route from the driver to the strip, and the length of strip fed from that point. A short illuminated shelf can have a long concealed cable route. Conversely, a driver can sit close to one end of a cabinet while the strip itself runs much farther. Check both paths rather than using the furniture width as a substitute for either.
Some 12V strip designs offer closer cut marks than comparable 24V designs, which can help when the light must end neatly inside a narrow opening. But cut interval is a property of the specific strip, not a guarantee attached to the voltage. Compare the actual cut diagrams before specifying either option.
Measure the illuminated opening rather than the outside width of the furniture. Leave room for the connector, end cap, cable exit, and any clearance needed to assemble the profile. The strip may physically fit yet still leave a visible dark section if the connector occupies part of the opening. A sample built into the actual profile is more useful than a strip laid over a drawing.
A compatible 12V replacement can avoid unnecessary changes to wiring, controls, and cabinet hardware. Before reusing a driver, verify that its output type and voltage match the replacement strip, that it can support the connected load, and that the existing dimmer or sensor works with the new assembly. A matching plug does not prove electrical compatibility.
If the old system already faded at the far end, replacing the strip alone may not solve the problem. Review the original cable route and feed layout before deciding whether to retain the existing platform.
A long line beneath kitchen cabinets is usually viewed as one fixture, even when several cabinet modules sit above it. If the line fades toward one end or changes brightness at a join, the difference can be easy to see on the worktop. A 24V strip is a sensible starting point, but the feed layout is what turns that choice into a consistent result.
Where the manufacturer permits it, separately fed sections can reduce the distance current travels along each strip. This does not require a visible break in the lighting: electrical sections can be planned around the furniture joints while the visible line is evaluated with its finished profile and diffuser.
A wardrobe may have lighting on both sides, illuminated shelves, and a door sensor, while its driver sits in a separate service compartment. Start with 24V when the cable layout makes voltage drop a concern. Then establish which sections switch together and which need independent control.
Think about replacement at the same time. A removable access panel and clearly identified connectors can make a failed component easier to isolate without dismantling finished joinery. That consideration can matter more over the life of a fitted wardrobe than the initial price difference between two strips.
Neither 12V nor 24V tells you how bright a strip will look on a worktop. Compare the finished light at the intended mounting position. A diffuser can soften visible LED dots, while the profile position changes where light falls and what reflects off glossy surfaces. Check the result from the user's normal viewing position, not just from directly beneath the strip.
Likewise, lower current does not automatically mean lower electricity use. Lower current can reduce wiring losses in a comparable installation, but total energy use also depends on the strip's electrical load, the driver's efficiency, and how long the lighting operates. Compare systems that provide the same useful lighting effect rather than treating voltage as an efficiency label.
Finally, dimming is a system decision. Verify that the strip, driver, and control method are compatible. For wardrobes and bedroom furniture, test door sensors, power restoration, and low-level dimming on the intended assembly. A light that works at full output may still flicker or switch abruptly at the low setting the customer uses most.
On the furniture drawing, mark where the light should start and stop, which joins should appear seamless, and where a user might see the strip directly. On a separate wiring layout, mark driver access, cable routes, feed points, connectors, and control zones. Comparing the drawings exposes conflicts early: the best place to conceal a connector is not always the best point to feed a long run.
Choose the layout most likely to expose a problem: the longest visible line, the tightest shelf opening, or the zone farthest from the driver. Use the intended strip, wiring, driver, controls, profile, and diffuser. Install the sample against the actual furniture finish or a representative material.

Check for end-to-end brightness differences, dark gaps, visible reflections, and inconsistent switching. For a bathroom vanity, assess the exposure of the strip, cut ends, connectors, and driver separately. Low voltage does not make the assembly moisture-resistant, and an ingress protection rating describes the protection of the enclosure or assembly as tested. Verify suitability and applicable installation requirements before approving the design.
Document the approved cut positions, feed locations, cable exits, control behavior, and service access. Label 12V and 24V parts clearly if both platforms are used. A change to the driver, cable, connector, or strip can affect how the assembly performs even when the furniture drawing is unchanged. Recheck the affected function before approving a substitution.
This is where OEM/ODM customization can help. The brief can cover not only strip size and appearance but also connector placement, switching behavior, and the way the lighting is assembled and serviced.
No. Use a compatible regulated constant-voltage driver that matches the strip's rated input. Connecting a 12V strip to a 24V output can damage it. Do not rely on a dimmer setting or a matching connector to correct a voltage mismatch.
No. The supported continuous run depends on the strip design, load, and feed arrangement. Ask for the manufacturer's limit for the exact strip and confirm whether it applies to a single-end feed or another approved layout. Check the cable route from the driver separately.
For short, separately fed cabinets, either can work, and 12V may be preferable when the actual cut marks fit better. For a continuous line across several cabinets, start by evaluating 24V. In both cases, test uniformity on the worktop with the intended diffuser installed.
Voltage drop is a common cause. Check whether the run exceeds the manufacturer's limit and whether the supply cable and connectors are suitable for the load. A revised feed layout or shorter, separately fed sections may help. Do not raise the supply voltage above the strip's rating to compensate.
Yes, if the strip is designed to be cut. Use only the marked cut points and allow room for connectors and end caps. For moisture-protected strips, follow the manufacturer's instructions for restoring protection at cut ends.
Only if the dimmer is rated for both voltages and is compatible with the load and the system's control method. That does not mean the strips can share a single fixed-voltage output. Verify each circuit and test the intended low-light setting before installation.
Send Farwise Technology Co., Ltd. your furniture drawings, illuminated opening sizes, preferred switching behavior, installation environment, and proposed driver locations. With 16 years in LED lighting manufacturing, Farwise supports OEM and ODM projects for cabinetry, wardrobes, bathroom vanities, beds, and commercial furniture. Ask for a 12V versus 24V recommendation and identify the cabinet or lighting zone you want to sample first.
1. - SignliteLED, Jacky Tang, "12V vs. 24V LED Strip Lights: How to Choose?" — comparison baseline. The original covers voltage, installation length, and common misconceptions. This article adds separate checks for the supply cable and the strip run, explains why brightness and energy claims require a like-for-like comparison, and gives furniture buyers a prototype and production approval workflow. [signliteled]
2. - Diode LED, "What Is Voltage Drop?" — the relationship between cable length, wire size, load, and visible lighting performance. [diodeled]
3. - Diode LED, "Solid Color Tape Light Installation Guide" — driver, wiring, dimmer compatibility, and installation considerations. [diodeled]
4. - Waveform Lighting, "What Is LED Strip Voltage Drop?" — the role of the strip's copper traces and current draw in end-to-end dimming. [waveformlighting]
5. - Flexfire LEDs, "How to Prevent Voltage Drop in LED Strip Lights" — separately fed sections and parallel supply layouts. [flexfireleds]
6. - International Electrotechnical Commission, "Ingress Protection (IP) Ratings" — what an IP rating describes and why it is distinct from operating voltage. [iec]
7. - Farwise Technology Co., Ltd., company brief supplied for this article — manufacturing experience, application coverage, and OEM/ODM capabilities. The mock-up and approval workflow is editorial guidance, not a report of a customer installation or product test.


