
Views: 222 Author: Farwise Lighting Publish Time: 2026-09-28 Origin: Site


Content Menu
● What Are LED Strip Lights and Rope Lights?
● LED Strip Lights vs. Rope Lights at a Glance
>> Light distribution and visual comfort
>> Fit, bending, and finished edges
● Which Light Works Best in Each Room?
>> Kitchen under-cabinet lighting
>> Wardrobes and display cabinets
>> Bathroom cabinets and vanities
>> Bed frames and hospitality furniture
● The System Matters More Than the Shape
● How to Specify a Better Furniture Lighting Solution
● What Most Comparisons Miss: Procurement and Maintenance
● Which Is Better for Your Project?
>> 1.Are LED strip lights brighter than rope lights?
>> 2.Can rope lights replace under-cabinet LED strips?
>> 3.Are silicone LED strips the same as rope lights?
>> 4.Can I cut either type to fit a cabinet?
>> 5.Which option is better for bathroom cabinets?
>> 6.Do both types work with dimmers or sensors?
When comparing LED strip lights vs. rope lights, the best choice depends on what the light must do. LED strips are usually the stronger option for under-cabinet tasks, wardrobe interiors, and integrated furniture lighting. Rope lights are often better suited to visible decorative outlines. The distinction is not simply brightness: light direction, available space, finish quality, and the complete electrical system all affect the result.
For furniture makers and project buyers, that last point matters. A light that looks attractive on a sample board may reveal individual bright spots on a glossy countertop, cast a shadow inside a wardrobe, or leave an awkward gap at the end of a cabinet run.

An LED strip light is a narrow, flexible circuit carrying a series of LEDs. Depending on its construction, it may be installed in a mounting channel, placed behind a diffuser, or enclosed in silicone to create a smoother-looking line of light. The underlying strip remains a directional light source, which makes placement especially important.
A rope light places its light source inside a rounded, flexible tube. The tube is part of its visible appearance. Rather than disappearing into a cabinet detail, it commonly serves as the detail: a glowing line along an edge, recess, or decorative feature.
Neither category describes one fixed level of quality. Both vary by product and manufacturer. LED rope lights should also be distinguished from older incandescent rope lights; comparing the latter with LED strips would confuse a difference in light-source technology with a difference in shape.
In practice, ask what the project needs to illuminate. If the goal is to see ingredients on a worktop, find clothing in a wardrobe, or add controlled light around a bathroom cabinet, a strip-based system often gives the designer more ways to direct and conceal the light. If the goal is to see the glowing fixture itself, rope lighting may be a better aesthetic starting point.
| Decision factor | LED strip lights | Rope lights |
|---|---|---|
| Visual form | Slim, flat, and easier to integrate into a shallow furniture detail | Rounded tube that is more likely to remain visible |
| Typical strength | Directing light toward a surface or through a selected diffuser | Creating a visible decorative line |
| Worktop lighting | Often suitable when positioned and shielded correctly | Usually less suitable when focused task light is needed |
| Tight cabinetry | Offers more low-profile installation options | Needs space for the tube and its mounting method |
| Curves and corners | Follows the product's permitted bending path; sharp turns need planning | Suits broad curves, but a neat square corner can be difficult |
| Cutting and finishing | Depends on the marked cutting points and matching connectors | Depends on the product's cutting and sealing instructions |
| Controls | Can be specified as part of a coordinated driver and control system | Available features vary; compatibility must be checked |
| Appearance when off | May be discreet or hidden | Tube can remain a visible design feature |
This table describes design tendencies, not universal specifications. In particular, do not assume that every strip is brighter, every rope light is weather-resistant, or either product can be cut wherever the installer wants.
An LED strip typically directs light outward from its mounting surface. That helps under a kitchen cabinet: the installer can aim illumination at the worktop instead of spending most of it inside the cabinet recess. Yet a bare strip can also expose individual light points. On polished stone, glass, or glossy doors, those points may show up as distracting reflections.
A diffuser, suitable profile, or silicone enclosure can soften the appearance. The right choice depends on what the user sees from normal standing and seated positions, not just on how the installation looks straight on. Shielding may improve comfort, but it also changes the delivered light; evaluate the finished assembly rather than the bare light source alone.
Rope lights create a different effect. Their rounded body can look attractive when the glowing line is intentionally visible. It is less useful when the brief calls for an unobtrusive fixture that sends light mainly onto a nearby work surface. For that reason, the two products can look similarly "linear" in a photograph while performing very differently in a room.
A strip can fit into details where a rounded rope would appear bulky. It can also be paired with joinery or a profile designed to conceal its edge. This is valuable in fitted kitchens and wardrobes, where the lighting should appear planned rather than added after installation.
Neither product should be forced around a sharp corner. Bend direction and allowable curvature depend on the exact construction. For a clean change of direction, a planned connection or separate illuminated section may look better than bending the light itself. Likewise, cutting should follow the manufacturer's marked positions and instructions; the end treatment is part of the installation, not an afterthought.
A useful drawing shows the start, end, corners, cable exit, and visible sightlines. Those details often settle the choice more effectively than a catalogue photograph.
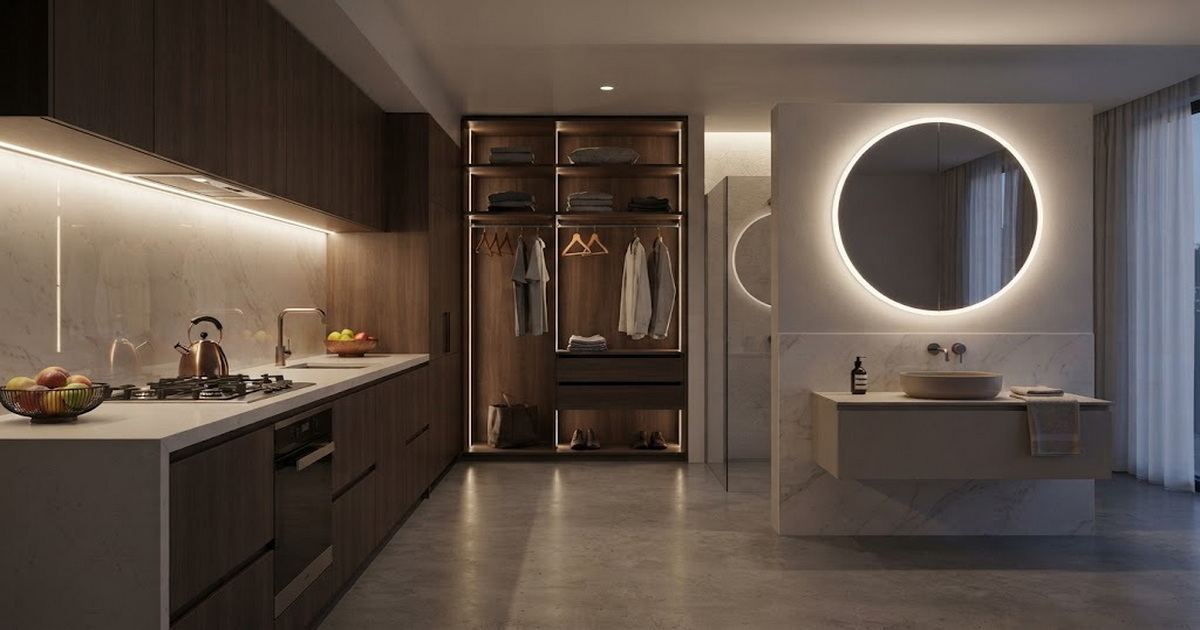
Choose a properly positioned LED strip system when the main aim is usable worktop light. Place the source where it illuminates preparation space without creating an uncomfortable direct view or a strong reflection. Test the proposed channel or diffuser with the actual countertop finish if possible.
Rope lighting can still work as a decorative glow above cabinets or within a feature recess. It should not automatically replace a task-lighting plan simply because it produces a continuous-looking line. A kitchen may benefit from both approaches, provided each has a clear purpose.
Inside a wardrobe, the challenge is not merely making the interior brighter. Shelves, hanging clothes, and cabinet doors can block poorly placed light. A concealed strip along a suitable cabinet edge may make contents easier to see while keeping the fixture out of view.
In a display cabinet, appearance matters as much as visibility. Test the light with the actual glass, finishes, and displayed materials. A strip that looks smooth behind a diffuser may still reflect in the door. A rope light may be appropriate when the rounded glowing outline is itself part of the display design, but its visible tube should be an intentional choice.
Bathroom cabinetry introduces moisture, cleaning, mirrors, and close viewing distances. The correct question is not "Is it silicone?" or "Does the tube look sealed?" It is whether the complete specified system—light, connections, power supply, and installation method—is suitable for its intended location.
For a mirror cabinet, a strip-based detail may offer a more integrated appearance. For a decorative recess away from the main grooming area, a visible rope-style line may suit the design. Either way, check the product's location suitability and installation guidance before approving it. A covering alone does not establish that an assembly is suitable for exposure to water.
Bed-frame lighting often calls for a low, restrained glow rather than an exposed bright source. A concealed strip can light the floor or a recessed furniture detail without making the fixture a focal point. Position it so someone lying in bed does not look directly into the LEDs.
Rope lighting can make sense for a deliberately visible feature line. In guest rooms, however, the selection should also account for replacement access: a beautiful effect loses value if routine servicing requires dismantling finished furniture.
One gap in many strip-versus-rope comparisons is their treatment of the light as an isolated product. In fitted furniture, the installation is a system: light source, power supply, wiring, connector, mounting detail, and any sensor or dimmer must work together.
A strip advertised as dimmable does not guarantee pleasant dimming once paired with an arbitrary driver and controller. An LED rope light does not guarantee it either. If dimming or automatic switching matters, test the exact combination before it is repeated across a furniture range or project. Look for stable output, an acceptable low-light appearance, and consistent behavior when switched on and off.
The power supply also needs a sensible home. Specify a position that meets the relevant installation instructions and remains accessible where servicing is expected. Identify how cables pass through the furniture and how an installer will reach each connection. Hidden wiring may improve the look of a cabinet, but inaccessible wiring can make later maintenance unnecessarily disruptive.
For longer or multi-section installations, do not infer a safe or visually consistent run from the length of a reel. The manufacturer's guidance and the proposed wiring layout should determine where power enters and whether the appearance remains uniform along the finished line.
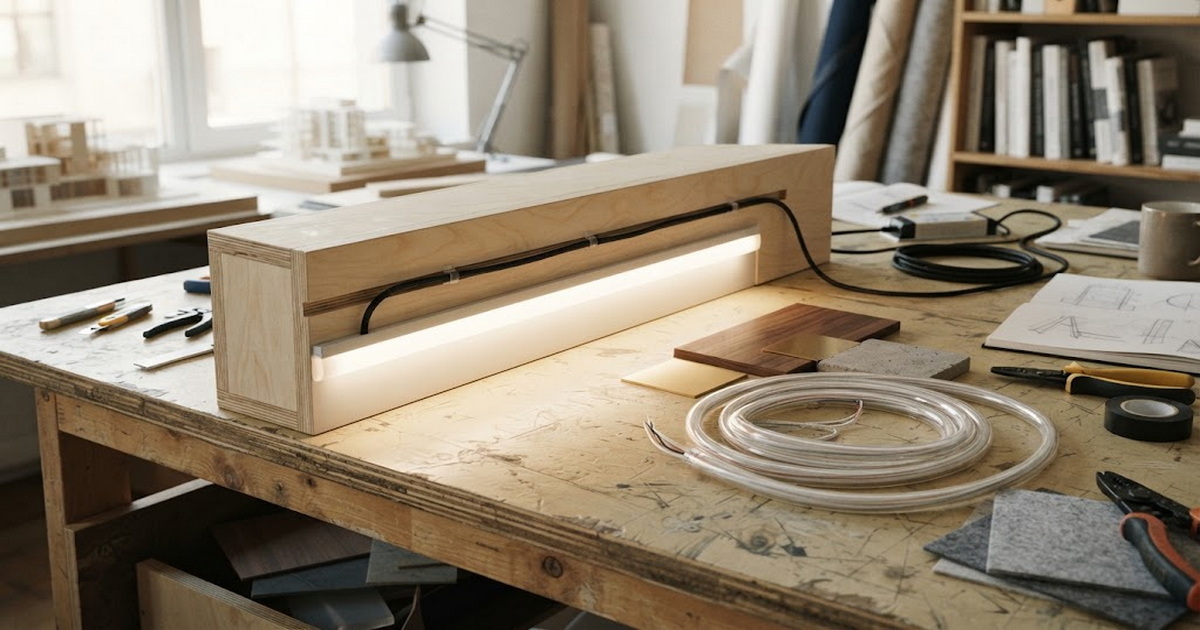
For a custom furniture project, I would settle the lighting effect before the product format. This avoids the common mistake of selecting a light that is easy to purchase but difficult to integrate.
1. Define the job. Is the light for a work surface, finding items, navigating at night, or creating a decorative outline? More than one purpose may require separate lighting zones.
2. Draw the visible detail. Mark where users stand or sit, which finishes may reflect the light, and whether the fixture should disappear when switched off.
3. Plan the physical route. Show the mounting position, corners, cable exit, connection points, and end treatment. Check the actual product's cutting and bending instructions.
4. Specify the electrical system. Confirm that the proposed light, power supply, sensor, and dimmer are compatible. Account for the intended installation environment.
5. Build a sample. Review it with the real cabinet finish, door, mirror, or countertop. Inspect it both switched on and switched off, from normal viewing positions.
6. Approve a repeatable assembly. Record the mounting method, wiring route, finish, and service access so production and installation teams can reproduce the result.
This process is especially valuable for original equipment manufacturer and original design manufacturer work. A sample should prove more than that the LEDs illuminate. It should show how the finished furniture looks, operates, and can be maintained.
The cheapest-looking component is not always the least costly installed solution. For a furniture manufacturer, cost also includes routing work, mounting hardware, compatible power supplies, assembly time, inspection, and future replacement. A rounded rope that needs visible clips may be simple in one decorative application but difficult to conceal in a premium cabinet. A strip may fit the design better yet require a carefully chosen profile and diffuser.
Ask a potential supplier for an assembly-level proposal, not just a photograph of a lit sample. The proposal should identify what is supplied, which items the furniture maker must source, and how the light connects to the agreed control scheme. It should also clarify how a failed component can be replaced without damaging the cabinet.
Another overlooked issue is consistency across a collection. If kitchen, wardrobe, and bathroom furniture use related lighting details, mismatched light appearance or controls can make the collection feel fragmented. Reviewing physical samples together helps buyers judge whether the intended effects work as a family, even when different fixtures are needed for different rooms.
These checks do not make one format universally superior. They make the purchasing decision less dependent on broad claims such as "brighter," "more flexible," or "more economical"—claims that may not hold for the exact products under consideration.
For most integrated furniture applications, LED strip lighting is the more adaptable starting point. Its low-profile form and mounting options support concealed worktop light, wardrobe illumination, cabinet displays, and soft bed-frame accents. A well-designed strip installation can be highly discreet, but the finished effect still depends on positioning, diffusion, and component compatibility.
Choose rope lighting when a visible, rounded line is the intended feature and the surrounding detail has room for it. Broad decorative outlines are a more natural fit than tightly integrated task lighting. Neither option should be selected solely on an assumed brightness, lifespan, water resistance, or purchase price.
Farwise Technology Co., Ltd. develops furniture-lighting solutions across LED silicone strip lights, cabinet lights, wardrobe lights, bathroom cabinet lights, and power supplies. For an OEM/ODM project, send Farwise your furniture drawings, target lighting effect, installation environment, and control requirements. Request a proposed assembly and physical sample before finalizing the design.
Not necessarily in every product comparison. LED strips often offer a better way to direct light onto a work surface, which can make them more useful for task lighting. Compare the actual products in the intended mounting positions rather than judging by format alone.
They may create a decorative glow, but they are not always a good substitute for worktop lighting. Consider whether the rope's shape can fit discreetly and whether enough useful light reaches the preparation area without uncomfortable reflections.
No. Both may look like flexible glowing lines, but a silicone-enclosed LED strip and a conventional rope light can differ in internal structure, light direction, mounting, cutting rules, and finish. Review the specific product construction before treating them as interchangeable.
Only where the particular product and its instructions permit cutting. Check the marked positions, approved connection method, and required end treatment before ordering. A cabinet's finished length should be planned around those constraints.
There is no safe choice based on shape alone. Select an assembly suitable for the bathroom cabinet's actual location, including its connections and power supply. For a concealed, integrated detail, a suitable strip-based system is often worth evaluating first.
Some do, but compatibility is product-specific. Confirm the light, power supply, and control device as a system, then test the proposed combination—especially if smooth dimming or reliable sensor operation matters to the project.
1. - LEDYi Lighting, "[LED Strip Lights Vs Rope Lights: Which Is The Best?]" — the comparison article used to establish the baseline and identify gaps addressed here.
2. - U.S. Department of Energy, "[LED Basics]" — LED light distribution, color quality, controls, efficiency, and system-level performance.
3. - U.S. Department of Energy, "[Upgrading Linear Fluorescent Fixtures to LED in Schools]" — guidance on evaluating installed light distribution, glare, dimming compatibility, flicker, and mock-ups. Its application is educational buildings, so it is used for general evaluation principles rather than furniture-specific requirements.
4. - UL Solutions, "[Landscape and Outdoor Lighting]" — distinctions between lighting-system components, location suitability, and ingress-protection evaluation.
5. - LEDVANCE, "[Why Do LED Lights Flicker and How to Fix It]" — the roles of drivers, connections, voltage, and dimmer compatibility in flicker.
6. - Home Energy Magazine editors, "[No-Regrets Remodeling, Second Edition]" — kitchen under-cabinet task lighting, shadow control, and planning lighting around the room's use.


