
Views: 277 Author: Farwise Lighting Publish Time: 2026-08-16 Origin: Site


Content Menu
● Why Uniform Building Outline Lighting Matters
● Common Causes of Uneven Neon Strip Lighting
>> 1. Choosing the Wrong Bending Direction
>> 2. Voltage Drop Across Long Runs
>> 3. Poorly Finished Joints and Corners
>> 4. Inadequate Outdoor Sealing
● How to Select a Flexible LED Neon Strip for Building Outlines
>> Light Quality and Visual Continuity
>> Flexibility and Shape Retention
● A Practical Installation Workflow
>> Step 1: Survey the Building at Day and Night
>> Step 2: Create a Lighting Layout and Cut Plan
>> Step 3: Build a Sample Section
>> Step 4: Install Mounting Components First
>> Step 5: Connect, Test, and Seal
>> Step 6: Document the Final System
● Design Insights from Real Projects
● Why Work with Farwise Technology
● Start Your Building Outline Lighting Project
● FAQ
>> 1. What causes dark spots in flexible LED neon strip lighting?
>> 2. Can flexible LED neon strip be used for outdoor building outlines?
>> 3. How can I avoid visible seams between neon strip sections?
>> 4. Is flexible LED neon strip suitable for curved façades?
>> 5. Why does one end of a long neon strip look dimmer?
>> 6. Should I use clips or mounting channels for façade neon strip lighting?
>> 7. What should be customized for an OEM or ODM neon strip project?
Uniform building outline lighting is not achieved simply by choosing a bright flexible LED neon strip. It depends on a coordinated approach to lighting design, product selection, circuit planning, mounting accuracy, waterproofing, and on-site testing.
For hotels, retail façades, commercial complexes, clubs, showrooms, and landmark buildings, a clean continuous line of light can make the architecture more recognizable after dark. However, visible LED dots, dark joints, uneven corners, colour inconsistency, sagging runs, and failed outdoor connections can quickly undermine the intended effect.
At Farwise Technology Co., Ltd., we have spent 16 years developing and manufacturing LED lighting solutions for furniture and commercial applications. From our experience supporting OEM and ODM projects, the most reliable building outline lighting projects begin with one principle: design the complete lighting system, not just the illuminated line.

Building outline lighting defines architectural edges, frames entrances, highlights rooflines, and gives a façade a recognizable nighttime identity. It can make simple geometry feel deliberate and premium, while helping visitors identify a venue from a distance.
Flexible LED neon strip is widely used for this purpose because its silicone diffuser creates a more continuous visual line than an exposed LED strip. The flexible form also makes it suitable for straight edges, rounded corners, curved façade details, and custom architectural shapes.
But visual uniformity is more than "no visible dots." A professional result requires consistency across the entire installation:
- Even light output from the beginning to the end of each run
- Clean corners and curves without kinks, compression marks, or light gaps
- Consistent colour appearance across separate sections
- Stable mounting that keeps the light line straight over time
- Reliable outdoor protection at every connection, end cap, and cable entry
- Controlled electrical design that avoids voltage-related dimming
A building outline can look acceptable during a daytime inspection yet reveal unevenness immediately after nightfall. That is why mock-ups, viewing-distance checks, and nighttime commissioning should be part of the project plan.
Most uneven façade lighting problems are predictable. They usually originate in the planning stage or in rushed installation work rather than in one isolated component.
Flexible LED neon strip is generally designed for a specific bending direction. Some versions bend vertically, while others bend horizontally. Selecting the wrong type for the architectural line can create twisting, pressure on the internal structure, or an unnatural curve.
For example, a strip intended for side bending may not sit correctly on a vertical-radius feature. The installer may force it into place, but the diffuser can distort and the light distribution may become visibly uneven.
Before confirming a project, review:
- The direction of every curve
- The smallest curve required by the building detail
- Whether the strip must turn around corners or follow freeform shapes
- The mounting surface and available fixing points
- The visual direction from which visitors will see the façade
Expert tip: Create a full-scale section sample for difficult corners before approving mass production or site installation. A short mock-up can reveal whether the selected light-emitting direction and mounting method are truly suitable.
Voltage drop is one of the most common reasons why a building outline looks brighter near the power feed and dimmer at the far end. Long continuous runs, insufficient cable sizing, and poorly planned power injection can all cause a visible change in brightness or colour.
The solution is not simply adding more power. The electrical layout must be planned according to the actual installation route, including cable distance, connection points, control zones, and maintenance access.
A practical approach includes:
1. Divide long façade lines into manageable lighting zones.
2. Plan power feed positions before the mounting work begins.
3. Keep cable routes as direct as possible.
4. Use appropriately sized cable for the load and distance.
5. Test the complete section at night before final sealing.
6. Confirm that dimming and control equipment is compatible with the lighting system.
A uniform diffuser cannot compensate for an uneven electrical supply. Stable power distribution is the foundation of stable visual output.
Joints are often the most visible weak point in a linear lighting project. If two sections do not align perfectly, the result can be a dark gap, a bright overlap, an interrupted line, or a mismatched colour appearance.
To improve joint quality:
- Use project-specific cutting plans instead of cutting by eye.
- Cut only at the manufacturer's designated cut marks.
- Keep the diffuser faces aligned in the same visual plane.
- Use compatible connectors, end caps, and sealing materials.
- Avoid placing joints at the most visually prominent façade locations.
- Test every connection before final waterproof sealing.
Where possible, position joints near natural architectural breaks, behind trims, or at transitions between lighting zones. This reduces their visual impact and makes future servicing easier.
For exterior projects, the strip itself is only one part of the weather-resistance strategy. Water can enter through connectors, end caps, cable entries, damaged seals, or poorly protected power and control equipment.
Outdoor lighting must be designed as a complete protected system. This includes the light source, connection method, mounting accessories, junction areas, driver locations, and cable management.
A durable installation should address:
| Installation Area | Main Risk | Recommended Approach |
|---|---|---|
| Strip body | UV exposure and surface aging | Select silicone-based material appropriate for exterior use |
| End caps | Moisture entry | Use matched caps and seal them correctly |
| Connectors | Water ingress and corrosion | Use compatible waterproof connection methods |
| Power supply | Heat and water exposure | Install in a protected, ventilated service location |
| Cable route | Mechanical damage | Use secure routing and strain relief |
| Mounting points | Movement and sagging | Use suitable clips, channels, or mounting tracks |
Do not treat waterproofing as an afterthought. A visually flawless lighting line can fail prematurely if the smallest connection detail is not properly protected.
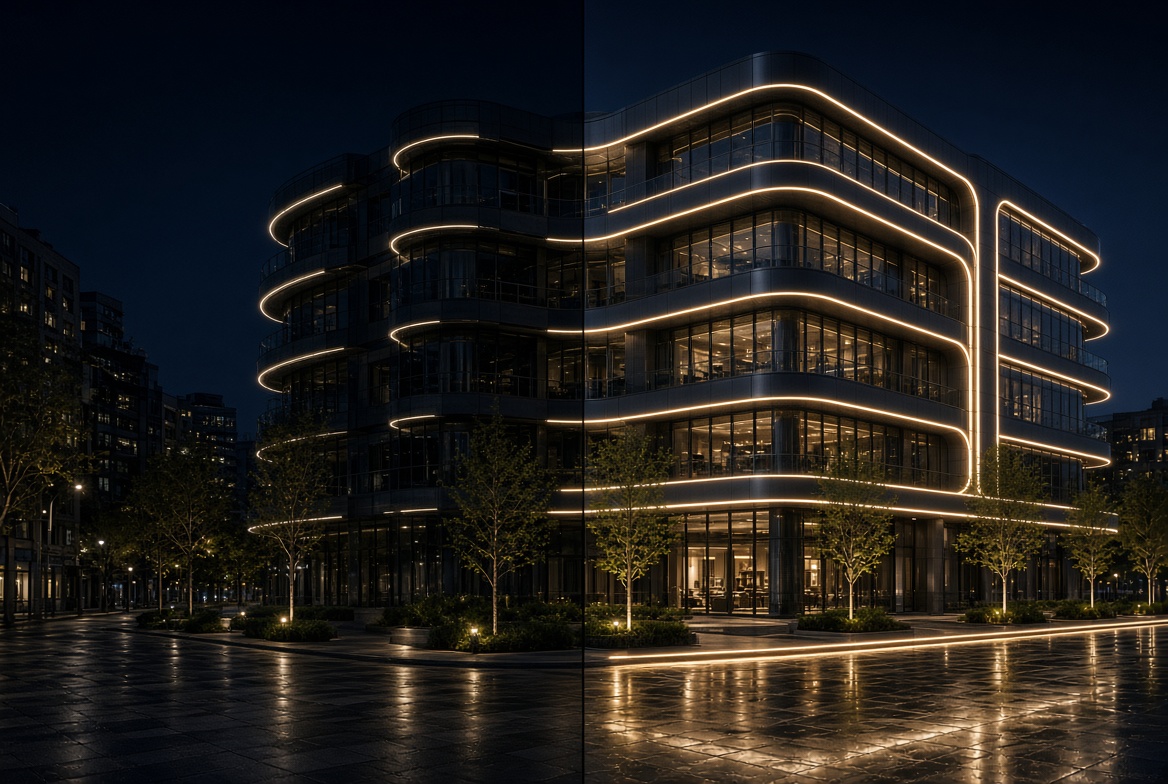
The correct flexible LED neon strip depends on the building design, installation environment, expected viewing distance, and control requirements. Avoid selecting solely by appearance in a catalogue or by the lowest quotation.
Instead, evaluate the project from four practical perspectives.
The diffuser, LED arrangement, internal optical structure, and material quality all influence whether the final line appears smooth. Low-quality products may show visible dots, edge darkening, inconsistent colour, or shadows around curves.
Request physical samples and inspect them in realistic conditions:
- View the strip from close range.
- View it from the expected street distance.
- Test straight sections and curved sections.
- Compare multiple pieces side by side.
- Test illuminated joints and end caps.
- Check the appearance against the actual façade finish.
A sample that looks acceptable on a workbench may look very different when installed against reflective metal, dark stone, glass, textured cladding, or painted walls.
A neon strip should bend smoothly without collapsing, twisting, or developing irregular light bands. At the same time, it should maintain a controlled shape after installation.
For building outlines, consider whether the application requires:
- Straight rooflines
- Soft curves
- Tight-radius architectural features
- Vertical façade accents
- Rounded columns
- Concealed cove details
- Custom logos or decorative outlines
The best option is not always the most flexible one. Excessive softness can make it difficult to maintain a straight, premium-looking line on long façade edges. The correct balance is flexibility where needed and stability where visible.
Mounting determines the final geometry of the illuminated line. A high-quality neon strip can still look poor if it is installed with uneven clip spacing or unsuitable fasteners.
For long and highly visible runs, consider dedicated mounting tracks or structured channels. They help maintain alignment, reduce sagging, and improve consistency around corners.
Before installation, confirm:
- Surface material and fixing method
- Required mounting spacing
- Expansion allowance for outdoor environments
- Access for replacement or servicing
- Corner transition method
- Whether the installation is surface-mounted or concealed
A building outline is typically part of a wider lighting system. The strip must work reliably with its power supplies, dimmers, controllers, sensors, wiring, and control protocol.
For projects requiring colour changes, dynamic effects, zoning, or smart control, define the control concept early. Retrofitting a control system after the façade is installed often creates unnecessary joints, difficult wiring paths, and maintenance risks.
Farwise supports customized solutions based on project requirements, including size, function, appearance, lighting layout, and integrated system needs. This is particularly valuable when standard products do not match the façade geometry or installation method.
A disciplined workflow helps prevent expensive rework. The following sequence is suitable for most commercial and architectural outline lighting projects.
Measure the real installation path rather than relying only on drawings. Note changes in façade material, hidden obstructions, drainage points, expansion joints, access limitations, and viewing angles.
A night survey is equally important. It shows where reflections, glare, competing ambient light, and dark background areas may affect the final result.
Prepare a layout that identifies every lighting zone, connection point, power feed, controller location, joint, corner, and cable route. This helps reduce on-site cutting errors and makes future maintenance more efficient.
The cut plan should also show which sections are continuous and where joints can be visually concealed.
Install a representative sample on the actual façade material whenever possible. Include a straight section, a curve or corner, a joint, and the intended mounting method.
Assess the sample after dark from the key viewing positions. Ask:
- Does the line look continuous?
- Are any dark areas visible?
- Is the colour consistent?
- Does the strip sit straight against the façade?
- Are the mounting accessories visually acceptable?
- Is there unwanted reflection on glass or polished surfaces?
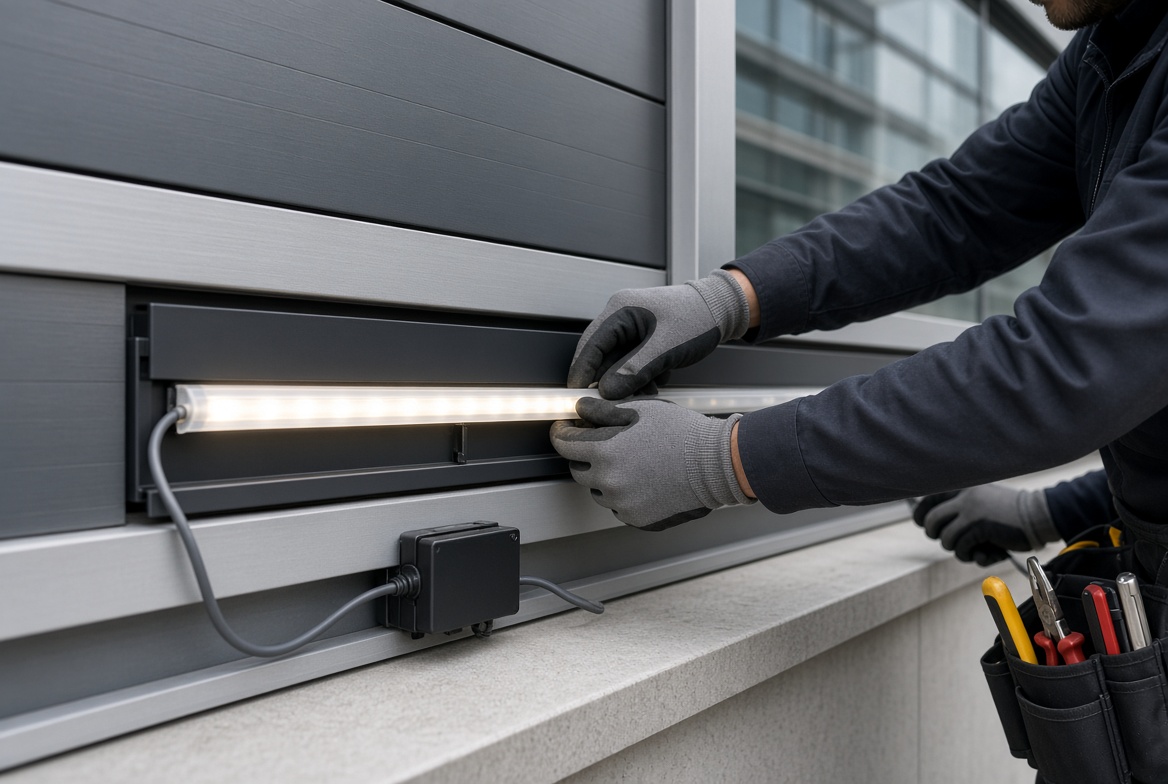
Install tracks, channels, brackets, or clips carefully before placing the neon strip. Check alignment frequently. Small mounting errors become obvious once the entire line is illuminated.
Do not overstretch the strip or force it around corners. Allow for material movement, especially in locations with significant temperature changes.
Complete electrical connections according to the approved system layout. Test each zone before permanently sealing connectors and end caps.
The final testing checklist should include:
- Full brightness check
- Dimming and control check
- Colour consistency check
- Nighttime viewing check
- Connection inspection
- Water-protection inspection
- Cable strain-relief inspection
- Replacement-access review
Keep records of the final layout, power feed locations, control zones, product model, installation accessories, and maintenance instructions. This documentation saves time when future expansion, repairs, or replacements are required.
From a manufacturer's perspective, the best building outline lighting projects are rarely those with the longest illuminated lines. They are the projects where light has a clear architectural purpose.
A hotel may use warm continuous lines to define a calm, premium entrance. A retail façade may use clean white or coloured linear lighting to strengthen brand visibility. A commercial complex may use segmented zones to distinguish entrances, public areas, and feature architecture.
The most effective designs generally follow three principles:
- Follow the architecture. Highlight important lines instead of outlining every possible edge.
- Control contrast. The light should complement the façade, not flatten it into a bright silhouette.
- Design for maintenance. A hidden but inaccessible driver or connection point can become a long-term operational problem.
For instance, outlining only a building's entrance canopy, vertical corner details, and roofline may look more sophisticated than lighting every window frame. Selective lighting creates hierarchy and keeps the façade visually balanced.
Farwise Technology Co., Ltd. is a source manufacturer with 16 years of experience in LED lighting. We provide a complete range of furniture and commercial lighting solutions, including LED silicone strip lights and related lighting systems for diverse applications.
Our product and project capabilities support:
- Furniture lighting for cabinets, wardrobes, bathroom cabinets, and bed structures
- Commercial and residential lighting solutions
- Flexible LED silicone strip lighting for linear and decorative applications
- OEM and ODM customization
- Customized dimensions, functions, appearance, and lighting solutions
- Support for integrated lighting concepts across multiple application scenarios
- Professional coordination for global customers and long-term project partners
For architectural outline lighting, a reliable supplier should understand more than the product itself. They should help evaluate the required shape, light direction, installation method, connection strategy, environmental conditions, and customization needs before production begins.
A uniform flexible LED neon strip installation begins with proper planning and ends with thorough nighttime testing. When the light source, mounting system, electrical layout, and outdoor protection work together, the result is a clean architectural line that remains visually consistent and operationally reliable.
If you are planning a hotel façade, retail exterior, commercial building outline, decorative architectural feature, or customized linear lighting project, contact Farwise Technology to discuss your OEM or ODM requirements. Our team can help develop a flexible LED lighting solution that fits your design, installation, and market needs.
Dark spots are commonly caused by poorly aligned joints, excessive bending, incorrect cutting, inadequate power supply, voltage drop, damaged internal components, or unsuitable mounting. A full system test before final sealing can identify many of these issues.
Yes, provided that the selected product, connectors, end caps, power supplies, cable entries, and installation method are suitable for the actual outdoor environment. The complete system needs weather protection, not only the illuminated strip.
Use an accurate cut plan, matched connectors, aligned mounting components, and carefully positioned joints. Place unavoidable joints at architectural transitions or less visible locations whenever possible.
Yes. It is well suited to curved architectural elements when the correct bending direction and suitable bending radius are selected. Always test complex curves with a physical sample before final installation.
This is usually caused by voltage drop or insufficient power distribution. Dividing the installation into planned lighting zones and using correctly designed power feeds can help maintain more consistent brightness.
The choice depends on the application. Clips can be suitable for certain curves and concealed areas, while mounting channels or tracks often provide better alignment and support for long, straight, highly visible façade lines.
Common customization areas include strip dimensions, bending direction, light-emitting surface, colour options, control requirements, cable length, connectors, end caps, mounting accessories, packaging, branding, and application-specific lighting layouts.
1. [ENTTEC — Neon Flex: Waterproof Silicone LED Strip]
2. [Bullard Bollards — Architectural LED Neon Lighting]
3. [Colors LED — Major Challenges in Outdoor Neon Flex]
4. [LEDOML — How to Choose Neon Flex Strip Lights for Architectural Lighting]
5. [Star Facade Lighting — How Neon Flex Can Transform a Building Facade]


