
Views: 222 Author: Farwise Lighting Publish Time: 2026-09-20 Origin: Site


Content Menu
● What Does Series and Parallel Wiring Mean?
>> Series Connection: One Run After Another
>> Parallel Connection: Independent Power Paths
● Why Parallel Wiring Is Usually Better for LED Strip Lights
● The Real Challenge: Voltage Drop in Long LED Strip Runs
● How to Wire Multiple LED Strips in Parallel
>> Step 1: Divide the Lighting Into Separate Zones
>> Step 2: Identify the Required Lighting Control Method
>> Step 3: Create a Power Distribution Point
>> Step 4: Keep Positive and Negative Polarity Correct
>> Step 5: Test at Full Operating Load
● When a Daisy-Chain Connection Can Still Work
● Power Injection: A Practical Solution for Longer Runs
● Professional Design Checklist for Furniture Lighting Projects
● Common LED Strip Wiring Mistakes
>> Using One Long Continuous Strip for Everything
>> Selecting a Power Supply Only by Minimum Demand
>> Hiding the Power Supply Without Service Access
>> Mixing Incompatible Products
● A Better Approach for OEM and ODM Furniture Lighting
● Build a More Reliable LED Lighting System
● FAQ
>> 1.Is it better to connect LED strip lights in series or parallel?
>> 2.Can multiple LED strips use one power supply?
>> 3.Why is one end of my LED strip dimmer than the other?
>> 4.Can I connect LED strips end to end?
>> 5.What is power injection for LED strip lights?
>> 6.Does a higher-voltage LED strip help reduce voltage drop?
>> 7.Should I install an LED power supply inside a cabinet?
When connecting multiple LED strip lights to one power supply, the wiring layout determines far more than whether the lights turn on. It affects brightness consistency, color accuracy, heat management, troubleshooting, and the long-term reliability of the entire lighting system.
For cabinet lighting, wardrobe lighting, bathroom mirror lighting, under-bed lighting, and custom furniture projects, the most dependable approach is usually to wire each LED strip run in parallel. This gives every run a direct electrical path back to the power source, helping prevent uneven brightness and voltage drop across the installation.
At Farwise Technology Co., Ltd., we have spent 16 years developing furniture-lighting solutions for global OEM and ODM customers. In practical projects, we regularly see that lighting failures are not caused by the LED strip itself—they are often caused by an unsuitable wiring plan, insufficient power capacity, poor connections, or a lack of planned power injection.
Before selecting a wiring method, it is important to separate the everyday use of "series" and "parallel" from the actual electrical structure inside an LED strip.
Most low-voltage LED strip systems are designed as constant-voltage products. They are commonly supplied at a specified system voltage, and their LED groups are already arranged in engineered circuits on the strip itself. The installer's main task is therefore not to redesign the internal LED circuit, but to distribute power correctly to multiple strip runs.
In an installation context, a series-style connection usually means connecting one strip section to the next in a continuous chain.
For example:
1. The power supply connects to Strip A.
2. Strip A connects to Strip B.
3. Strip B connects to Strip C.
4. Electricity travels through the first section before reaching the later sections.
This layout is often called a daisy-chain connection. It can look simple because it reduces the number of wires returning to the power supply. However, it also places a growing electrical load on the earlier strip sections and connection points.
As the total run becomes longer, the far end may receive less usable voltage than the beginning. The result can be visible dimming, reduced color consistency, or unstable performance.
A parallel connection means each LED strip run receives positive and negative power from the same supply output or distribution point.
For example:
1. The power supply connects to a distribution block.
2. Each LED strip run has its own positive and negative connection.
3. Every run receives the intended supply voltage.
4. The current load is divided among the separate branches.
For most cabinet, wardrobe, mirror, shelving, and architectural lighting applications, this is the preferred approach because it supports more uniform illumination and makes the system easier to test, maintain, and expand.

The main advantage of parallel wiring is that each branch receives power independently. Instead of forcing power for several strips through the first strip's copper path and connectors, each run is supplied more directly.
This helps solve several common installation problems.
| Installation Factor | Series-Style Daisy Chain | Parallel Wiring |
|---|---|---|
| Brightness consistency | May decrease toward the end of a long run | More consistent across separate runs |
| Voltage delivery | Later strips may receive reduced voltage | Each branch receives supply voltage more directly |
| Troubleshooting | A fault may affect downstream sections | Each branch can be checked separately |
| System expansion | Adding more strips can overload early sections | New branches can be planned more clearly |
| Cabinet and furniture use | Better for short, light-load links only | Better for multi-zone lighting layouts |
| Long-run reliability | Higher risk if not carefully designed | Easier to manage with proper distribution |
Parallel wiring does not mean that all installations become automatically problem-free. The power supply, cables, connectors, control system, and total load still need to be planned correctly. But it creates a stronger foundation for stable performance.
A professional LED lighting layout should always consider the entire electrical path—not only the LED strip itself.
Voltage drop is one of the most common reasons LED strip lighting looks uneven. It occurs when electrical energy is lost as current travels through copper traces, wires, connectors, and other parts of the circuit.
The longer the pathway and the higher the current demand, the greater the chance that voltage at the far end will fall below the intended level.
In real furniture-lighting projects, voltage drop can appear as:
- The end of a cabinet light strip looks dimmer than the beginning
- Warm-white light appears slightly different at the far end
- RGB or RGBW lighting shows color shift during high-output operation
- A mirror or bathroom cabinet light flickers when switched to full brightness
- Motion-sensor or touch-control systems behave inconsistently
- Connectors or cables become warmer than expected
- The lighting system works during testing but becomes unstable after full installation
A long strip does not always need to be replaced. In many cases, the solution is better power distribution.
Every conductor has resistance. When current passes through a conductor, some voltage is lost along the way. In a low-voltage lighting system, even a small loss can be noticeable because the available voltage is already limited.
Several factors increase the likelihood of voltage drop:
- Long LED strip runs
- High-density or high-output LED strips
- Thin connection cables
- Multiple strips connected in a chain
- Low-quality connectors with weak contact pressure
- Long distances between the power supply and the lighting area
- Insufficient power injection points
- Inappropriate control equipment for the total load
A higher-voltage constant-voltage system may reduce the effect of voltage drop compared with a lower-voltage system over the same type of installation. However, the correct choice still depends on the strip design, installation length, control method, brightness target, and safety requirements.
A parallel wiring plan should be prepared before installation begins. This is especially important in custom cabinetry, whole-house furniture lighting, hotel interiors, retail displays, and project-based installations where wires may be hidden after assembly.
Start by identifying independent lighting areas.
For a kitchen, this may include:
- Under-cabinet lighting
- Inside-cabinet shelf lighting
- Toe-kick lighting
- Drawer lighting
- Pantry lighting
- Glass cabinet lighting
For a wardrobe, the zones may include hanging-rail lighting, shelf lighting, side-panel lighting, drawer lighting, and sensor-controlled interior lighting.
Each zone should be considered as a separate electrical branch rather than simply extending one strip from another.
The wiring plan should match the intended user experience. Common control methods include:
- Standard wall switching
- Touch-switch control
- Door-activated sensors
- Hand-wave sensors
- PIR motion sensors
- Dimming systems
- Smart-home controllers
- Remote-control systems
- Tunable-white control
- RGB or RGBW color control
The controller must be compatible with the strip type and capable of handling the total connected load. If multiple lighting zones need independent control, plan separate outputs or controllers before furniture production begins.
Instead of connecting every strip directly to one crowded power-supply terminal, use a properly designed distribution point where appropriate.
This may include:
- A distribution block
- A terminal box
- A multi-output splitter
- A dedicated wiring harness
- A custom OEM connector solution
The goal is to create clean, organized branch connections. Each strip run should have a clear positive and negative path back to the source.
For integrated furniture lighting, pre-assembled cable harnesses can reduce installation time, minimize connection errors, and improve production consistency.
Correct polarity is essential for low-voltage LED systems.
Connect:
- Positive to positive
- Negative to negative
Before mounting the strip permanently, test each branch. A polarity mistake may prevent the strip from lighting, cause control problems, or damage certain electronic components.
For RGB, RGBW, tunable-white, and addressable systems, the wiring process may involve additional signal lines. Follow the applicable wiring diagram for the exact strip and controller combination.
Do not test only for a few seconds. Turn on the entire system and operate it at the intended maximum brightness for a meaningful period.
During the test, check:
- Brightness at the beginning and end of every run
- Consistency between lighting zones
- Controller response
- Dimming behavior
- Sensor activation
- Cable and connector temperature
- Power-supply stability
- Color performance for adjustable or color-changing systems
Testing before final cabinet assembly or ceiling closure can prevent expensive rework later.
Series-style daisy chaining is not always wrong. It can be practical for short sections where the total load is low and the product manufacturer confirms that the connection method is suitable.
It may be appropriate when:
- The LED strip segments are short
- The installation includes only a small number of sections
- The total load is low
- The power supply is located close to the strip
- The strip is used within its recommended maximum run length
- The installation has been tested for brightness consistency
- Connector and cable quality are appropriate
For example, a short decorative strip inside a single small cabinet compartment may perform well with a direct continuation connection.
However, this same method becomes much less suitable when the project expands to multiple cabinets, long wardrobe systems, large bathroom mirrors, commercial shelving, or high-output task lighting.
The key question is not simply, "Can the strips be connected end to end?" The better question is: Will every section receive stable power and deliver the intended lighting performance after long-term use?
Power injection means adding extra power-feed points along an LED strip run. Instead of allowing all current to enter only at one end, the strip receives power at additional locations.
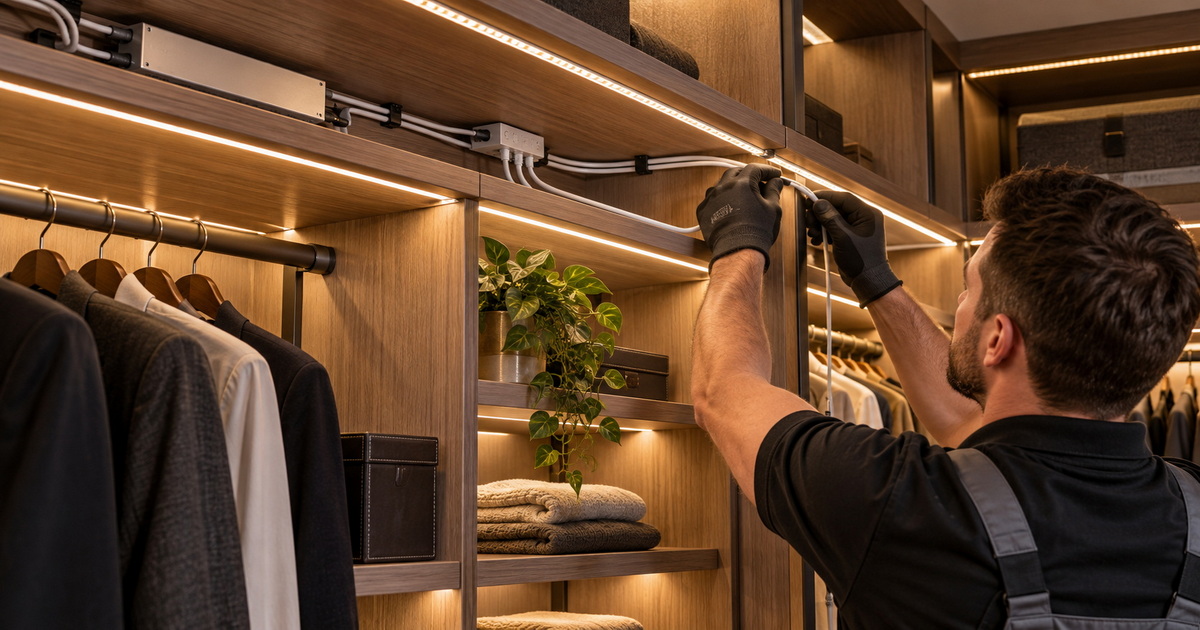
This reduces the distance that current must travel through the strip's copper traces.
Common power-injection strategies include:
- Feeding power from both ends of a strip
- Feeding power from the center of a long strip
- Adding a separate feed wire to the far end
- Dividing a long installation into multiple parallel branches
- Using a main power bus with planned branch feeds
For a continuous installation, power injection should maintain correct polarity and be designed around the actual system load. It should not be treated as an afterthought once the cabinet has already been installed.
Industry installation guidance commonly recommends creating separate power paths for long runs, rather than relying on one continuous chain of strip sections. It also emphasizes planning cable size, total load, and additional power-feed points before final mounting.
A stable LED furniture-lighting system begins with planning. Before production or installation, review the following points.
- Define every lighting zone
- Identify whether the application needs ambient, task, decorative, or sensor-activated light
- Confirm where the LED strips, cabinet lights, wardrobe lights, and drivers will be installed
- Ensure the power supply remains accessible for future service where possible
- Plan wire routes before cabinet panels are closed
- Calculate the total connected lighting load
- Select a suitable power supply with operating headroom
- Confirm compatibility between strip lights, controllers, sensors, and drivers
- Use properly sized cables for the distance and load
- Avoid overloading a single output branch
- Protect circuits according to the project's electrical requirements
- Test all branches under full operation before final installation
- Choose LED strip lights appropriate for the intended mounting location
- Select suitable silicone protection where moisture, cleaning, dust, or exposed installation conditions require it
- Match the lighting effect to the furniture material, cabinet depth, diffuser design, and user expectations
- Choose connection methods suitable for repeated installation and maintenance
- Consider custom cable length, connector type, control function, and mounting profile during project development
For bathroom cabinet applications, special attention should be given to the installation environment, product protection level, ventilation, and local electrical requirements. Moisture exposure and service accessibility should be considered from the beginning rather than after the lighting system is installed.
Even high-quality LED strips can perform poorly when the installation design is incomplete. The following mistakes are frequently seen in residential and commercial projects.
A long continuous strip may look convenient, but it can produce uneven brightness if the run exceeds the practical electrical limits of the system.
Better approach: Divide the project into shorter, independently powered branches.
A power supply should not be selected with no allowance for real operating conditions. Lighting may perform differently once controllers, sensors, cables, and multiple zones are operating simultaneously.
Better approach: Plan appropriate capacity and leave a reasonable operating margin based on the complete system design.
The cable between the power supply and the LED strip also contributes to voltage drop. A high-quality strip cannot compensate for undersized or excessively long supply wiring.
Better approach: Consider both the strip length and the wire length from the driver to each branch.
Power supplies and controllers may eventually require inspection, replacement, or adjustment.
Better approach: Place serviceable components in accessible but discreet locations, such as ventilated cabinet compartments, removable panels, or planned access areas.
Different voltages, controllers, dimmers, connectors, and strip types should not be combined without confirming compatibility.
Better approach: Treat the lighting system as one coordinated solution, not a collection of unrelated parts.
For furniture brands, cabinet manufacturers, importers, and project contractors, wiring design should be considered during product development—not only at the installation stage.
A coordinated OEM or ODM lighting solution can include:
- Custom LED silicone strip light lengths
- Cabinet-light and wardrobe-light combinations
- Pre-wired connectors and harnesses
- Sensor-controlled lighting systems
- Customized power supplies and control solutions
- Branding, packaging, and appearance customization
- Lighting layouts designed for specific furniture structures
- Integrated solutions for kitchen, wardrobe, bathroom, bedroom, and commercial display applications
At Farwise Technology Co., Ltd., we help customers develop practical furniture-lighting systems rather than simply supplying individual components. Our product range includes LED silicone strip lights, LED cabinet lights, LED wardrobe lights, LED bathroom cabinet lights, and LED power supplies designed to support integrated applications across residential, commercial, hospitality, and customized furniture projects.
The objective is simple: deliver lighting that is easier to install, more consistent in use, and better aligned with the final furniture design.
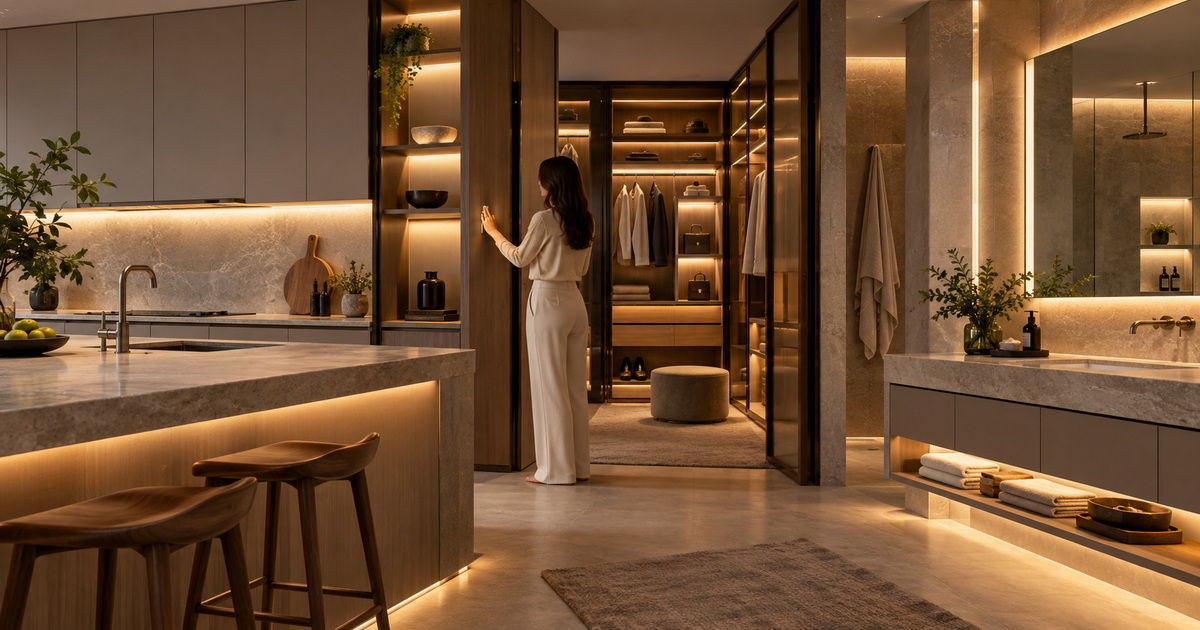
The best LED strip installation is not simply the one with the fewest wires. It is the one that provides stable brightness, clean control, safe power distribution, practical service access, and a consistent visual result across every cabinet, wardrobe, shelf, and mirror.
For multi-zone furniture lighting, use a well-planned parallel layout, verify the full system load, and provide additional power-feed points where longer runs require them. This approach helps protect lighting quality from the first installation through years of daily use.
Farwise Technology Co., Ltd. provides customized LED silicone strip lights, cabinet lights, wardrobe lights, bathroom cabinet lights, LED power supplies, and integrated OEM/ODM furniture-lighting solutions. Contact our team to discuss your lighting layout, control requirements, product customization, and project-specific wiring solution.
For most low-voltage LED strip installations, parallel wiring is the better choice. Each strip run receives power directly from the source or distribution point, which helps maintain more consistent brightness and reduces the risk of voltage drop across multiple zones.
Yes. Multiple LED strips can use one power supply if the total connected load, control equipment, cable layout, and branch distribution are all planned correctly. Parallel branches are generally more reliable than connecting many strips in a long chain.
The most likely cause is voltage drop. Electricity loses voltage as it travels through long strip traces, wires, and connections. Dividing the run, using parallel branches, supplying power from both ends, or adding power injection can help improve uniformity.
Yes, but only for short runs within the product's recommended connection limits. For longer layouts, end-to-end connection can cause dimming, color inconsistency, and excessive load on earlier sections of the strip.
Power injection is the addition of extra power-feed points along a strip. It helps reduce voltage drop by shortening the electrical path that current must travel through the strip itself.
In comparable applications, a higher-voltage constant-voltage strip can be more suitable for longer runs because it generally experiences less voltage loss than a lower-voltage alternative. The final choice should still be based on the complete lighting design, compatible controls, cable distance, and intended use.
It can be installed inside a cabinet if the location is appropriate for ventilation, service access, electrical safety, and the project's applicable installation requirements. Avoid sealing the power supply in a space where it cannot be inspected or replaced.
1. [Mingxue LED — Connecting LED Strips in "Series" vs "Parallel"]
2. [HitLights — Series vs Parallel Wiring LED Strips]
3. [Flexfire LEDs — How to Prevent Voltage Drop in LED Strip Lights]
4. [Super Bright LEDs — The Ultimate LED Strip Light Guide]
5. [aspectLED — Voltage Drop in LED and Low-Voltage Lighting Circuits]
6. [aspectLED — Low Voltage Lighting: The Electrician's Guide to LED Strips]


