
Views: 222 Author: Farwise Lighting Publish Time: 2026-09-04 Origin: Site


Content Menu
● Start With the Complete LED Lighting System
● Check Voltage and Polarity First
>> Understand Positive and Negative Connections
● Calculate Power Supply Capacity
>> Why Power Supply Headroom Matters
● Prevent Voltage Drop on Long LED Strip Runs
>> Practical Ways to Reduce Voltage Drop
>> Example: Wardrobe Lighting With Multiple Zones
● Series vs. Parallel Wiring for LED Strips
● How to Wire Single-Color LED Strip Lights
>> Direct Wiring With an LED Power Supply
>> Add a Dimmer, Touch Sensor, or Door Sensor
● How to Wire Tunable White LED Strip Lights
>> Recommended Wiring Sequence
● How to Wire RGB, RGBW, and RGBCCT LED Strip Lights
>> RGBW and RGBCCT Wiring Basics
● Use Amplifiers and Controllers Correctly
>> Avoid These Common Mistakes
● Addressable LED Strip Wiring: Data Direction Matters
>> Basic Addressable LED Strip Wiring Steps
● Safety and Installation Checklist
● Build a Better Furniture Lighting System With Farwise
● FAQ
>> 1. Can I connect multiple LED strip lights to one power supply?
>> 2. Why is my LED strip dim at the end?
>> 3. Can I wire LED strip lights directly to household electricity?
>> 4. Do RGB LED strip lights need a controller?
>> 5. What is the difference between RGBW and RGBCCT LED strip lights?
>> 6. When should I use an LED amplifier?
>> 7. Can LED strip lights be installed inside bathroom cabinets?
>> 8. Is it better to solder LED strip connections or use connectors?
Correct LED strip light wiring begins long before the first connector is installed. A reliable LED lighting system depends on matching the LED strip, LED power supply, controller, wiring layout, and installation environment—especially in cabinets, wardrobes, bathroom cabinets, bed frames, and other furniture-lighting applications.
For homeowners, contractors, cabinet makers, and lighting brands, the goal is not simply to make an LED strip turn on. The goal is to create stable, even, safe, serviceable lighting that maintains consistent brightness and color across the full installation. This guide explains how to wire LED strip lights professionally, avoid common faults, and select the right wiring approach for monochrome, tunable white, RGB, RGBW, RGBCCT, and addressable LED strip systems.
Farwise Technology Co., Ltd. has focused on LED lighting manufacturing for 16 years, supplying integrated furniture-lighting solutions including LED silicone strip lights, LED cabinet lights, LED wardrobe lights, LED bathroom cabinet lights, LED power supplies, and customized OEM/ODM lighting systems. Based on practical product development and application experience, this guide is designed to help you build lighting layouts that work in real furniture and commercial projects—not only on a wiring diagram.

An LED strip is only one part of the installation. Even a high-quality strip can perform poorly when the power supply is undersized, polarity is reversed, wiring is too thin, or the controller is incompatible.
Before wiring LED strip lights, identify these five components:
- LED strip light: The light source, such as single-color, tunable white, RGB, RGBW, RGBCCT, or addressable LED strip.
- LED power supply: Converts incoming AC electricity into the required DC output for the LED lighting system.
- Controller, dimmer, or sensor: Controls switching, dimming, color temperature, color changing, or smart-home functions.
- Cables and connectors: Deliver power and signals from the driver or controller to the LED strip.
- Mounting and protection accessories: Aluminum profiles, silicone sleeves, end caps, connectors, cable channels, and junction boxes where required.
A basic single-color cabinet-lighting circuit usually follows this order:
AC input → LED power supply → dimmer or sensor → LED strip light
A color-changing or tunable system commonly follows this order:
AC input → LED power supply → LED controller → LED strip light
For advanced commercial systems, the control chain may include a DALI driver, DMX decoder, amplifier, gateway, wall panel, or automation controller.
The most important rule when wiring LED strip lights is simple: the voltage of every DC component must match.
For example, a DC LED strip must be paired with a power supply that provides the same DC voltage required by that strip. Do not connect a low-voltage LED strip directly to household mains electricity. Do not assume that two products are compatible simply because their connectors fit together.
Before installation, inspect the printed markings on:
- The LED strip PCB.
- The LED power supply label.
- The controller or dimmer.
- The amplifier or decoder.
- The connector or extension cable.
Most constant-voltage LED strips use polarity markings:
- "+" or V+ means positive.
- "–" or V– means negative.
- RGB, RGBW, and RGBCCT strips may use one common positive terminal plus several negative color-channel terminals.
- Some products use a common negative design instead, so always follow the strip's printed labels rather than relying only on wire color.
For a single-color LED strip, the wiring arrangement is usually straightforward:
| Component | Connection requirement |
|---|---|
| LED power supply positive output | Connect to LED strip positive terminal |
| LED power supply negative output | Connect to LED strip negative terminal |
| Dimmer or sensor | Install according to its input and output markings |
| LED strip | Connect only at designated solder pads or connectors |
If the LED strip does not illuminate, switch off the power first. Then check polarity, connector seating, cable damage, and controller compatibility. Never reverse wires repeatedly while the system is energized.
An LED power supply should not be selected only by appearance, size, or price. It must provide adequate capacity for the total connected lighting load while preserving a practical operating margin.
Use this basic formula:
Total LED Load=Strip Power Per Length×Installed Length
Then select a power supply with additional capacity rather than operating it continuously at its maximum rating. A common professional practice is to allow approximately 20% headroom for normal operating stability, heat management, and long-term reliability.
For example, if multiple cabinet LED strips, wardrobe lights, and shelf lights are connected to one driver, calculate the combined load of every connected light—not just the longest strip.
An undersized LED driver may create problems that appear only after installation:
- Flickering during startup or dimming.
- Reduced brightness.
- Unstable color performance.
- Overheating.
- Early driver failure.
- Unexpected shutdown under full load.
- Noise from the power supply or dimmer.
For furniture-lighting projects, power supplies are often installed inside cabinets, behind mirrors, under beds, above wardrobes, or within concealed ceiling voids. Because these locations may have limited ventilation, selecting a stable, appropriately sized LED power supply is especially important.
Voltage drop is one of the most common causes of uneven LED strip lighting. It occurs when electrical energy is lost as current travels through cables and conductive strip circuits over distance.
In practical terms, voltage drop may cause:
- Bright light near the power source and dim light farther away.
- A visible change in white-light appearance.
- Weak or shifted RGB colors at the end of a run.
- Inconsistent tunable-white color temperature.
- Reduced reliability in long cabinet or wardrobe lighting installations.
The original source article correctly identifies voltage drop as a core design issue. However, a more useful professional approach is to treat voltage drop as a layout-planning issue, not a problem to solve after the lights have already been installed.
- Use shorter LED strip runs where possible.
- Use a higher-voltage LED strip system when appropriate.
- Use thicker cables for longer power-feed distances.
- Keep the power supply reasonably close to the LED strip.
- Feed power from both ends of a long strip when the product design allows it.
- Use parallel wiring for multiple separate sections.
- Divide a large installation into multiple independently powered zones.
- Follow the supplier's recommended maximum continuous run length for the specific LED strip.
Higher-voltage systems can reduce current for the same lighting load, which can help limit voltage drop across longer runs. Industry guidance also emphasizes matching the DC output voltage of the power supply to the LED strip voltage and planning additional direct power feeds for installations that exceed the strip's published run length.
Imagine a large walk-in wardrobe with:
- Hanging-rail lighting.
- Shelf lighting.
- Drawer lighting.
- Vertical side lighting.
- A sensor-controlled entry light.
Instead of extending one LED strip from the first section through every shelf and cabinet panel, divide the design into separate lighting zones. Run dedicated wiring from a central power supply or from several appropriately located power supplies.
This approach makes brightness more consistent and simplifies troubleshooting. If one section needs maintenance, it can be isolated without removing the entire lighting system.
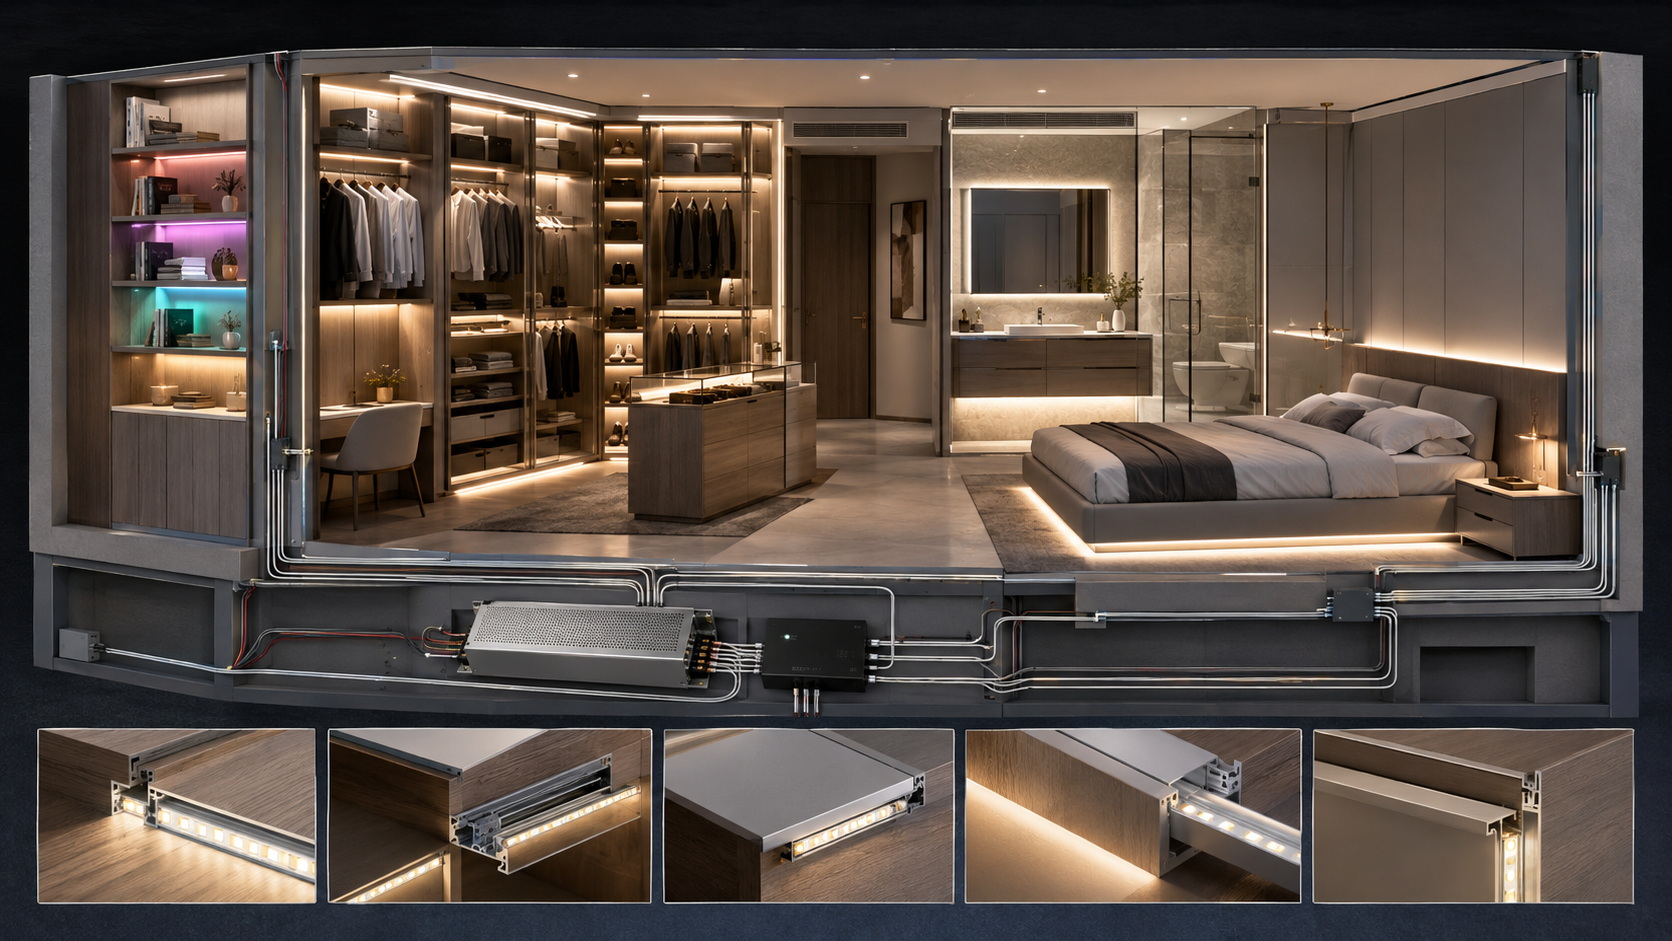
The way LED strips are connected affects brightness consistency, cable routing, and maintenance.
Series wiring connects one LED strip section to the next in a continuous chain.
Advantages:
- Faster installation for short runs.
- Fewer return cables to the power supply.
- Useful for simple, low-load applications.
- Can reduce visible wiring in compact furniture structures.
Limitations:
- Current must pass through the earlier strip sections.
- Voltage drop becomes more likely as the run becomes longer.
- The far end may appear dimmer or show different color output.
- A problem in one connection can affect downstream sections.
Series wiring is generally best for short, controlled installations that remain within the LED strip manufacturer's recommended continuous run length.
Parallel wiring connects multiple LED strip sections directly to a common power source or distribution point.
Advantages:
- Each section receives a more consistent supply voltage.
- Better choice for multi-zone furniture lighting.
- Helps reduce visible brightness differences.
- Easier to isolate a failed section.
- Suitable for long cabinetry, retail displays, wardrobe systems, and commercial joinery.
Limitations:
- Requires more cables.
- Requires organized wiring distribution.
- May need terminal blocks, splitters, or distribution boxes.
- Cable routing should be planned before cabinet assembly.
For most professional cabinet, wardrobe, and bathroom cabinet projects, parallel wiring is the more reliable long-term solution when multiple lighting sections are installed.
Single-color LED strip lights are widely used for under-cabinet lighting, toe-kick lighting, wardrobe rails, shelf illumination, mirror surrounds, and bed-frame ambient lighting.
A standard single-color LED strip generally has two terminals:
- Positive.
- Negative.
Use direct wiring when the LED strip only needs basic on/off control.
1. Turn off the incoming AC power.
2. Mount the LED power supply in a dry, accessible, ventilated location.
3. Connect the AC input to the power supply according to local electrical requirements.
4. Connect the DC positive output to the LED strip positive terminal.
5. Connect the DC negative output to the LED strip negative terminal.
6. Check every connection before energizing the system.
7. Turn on the power and confirm uniform illumination.
For concealed furniture lighting, cable management matters as much as electrical connection. Route wires through protective channels or drilled pathways that do not pinch cables when drawers, doors, hinges, or adjustable shelves move.
For cabinets and wardrobes, the most useful controls are often simple rather than complicated:
- Touch dimmers for bedside furniture.
- Door sensors for wardrobe lighting.
- Hand-sweep sensors for kitchens.
- PIR motion sensors for closets and hallway cabinets.
- Wireless dimmers for retrofit projects.
- Smart controllers for connected-home installations.
Place the sensor where it can detect normal user movement or door action without being blocked by clothing, cabinet doors, decorative panels, or metal hardware.
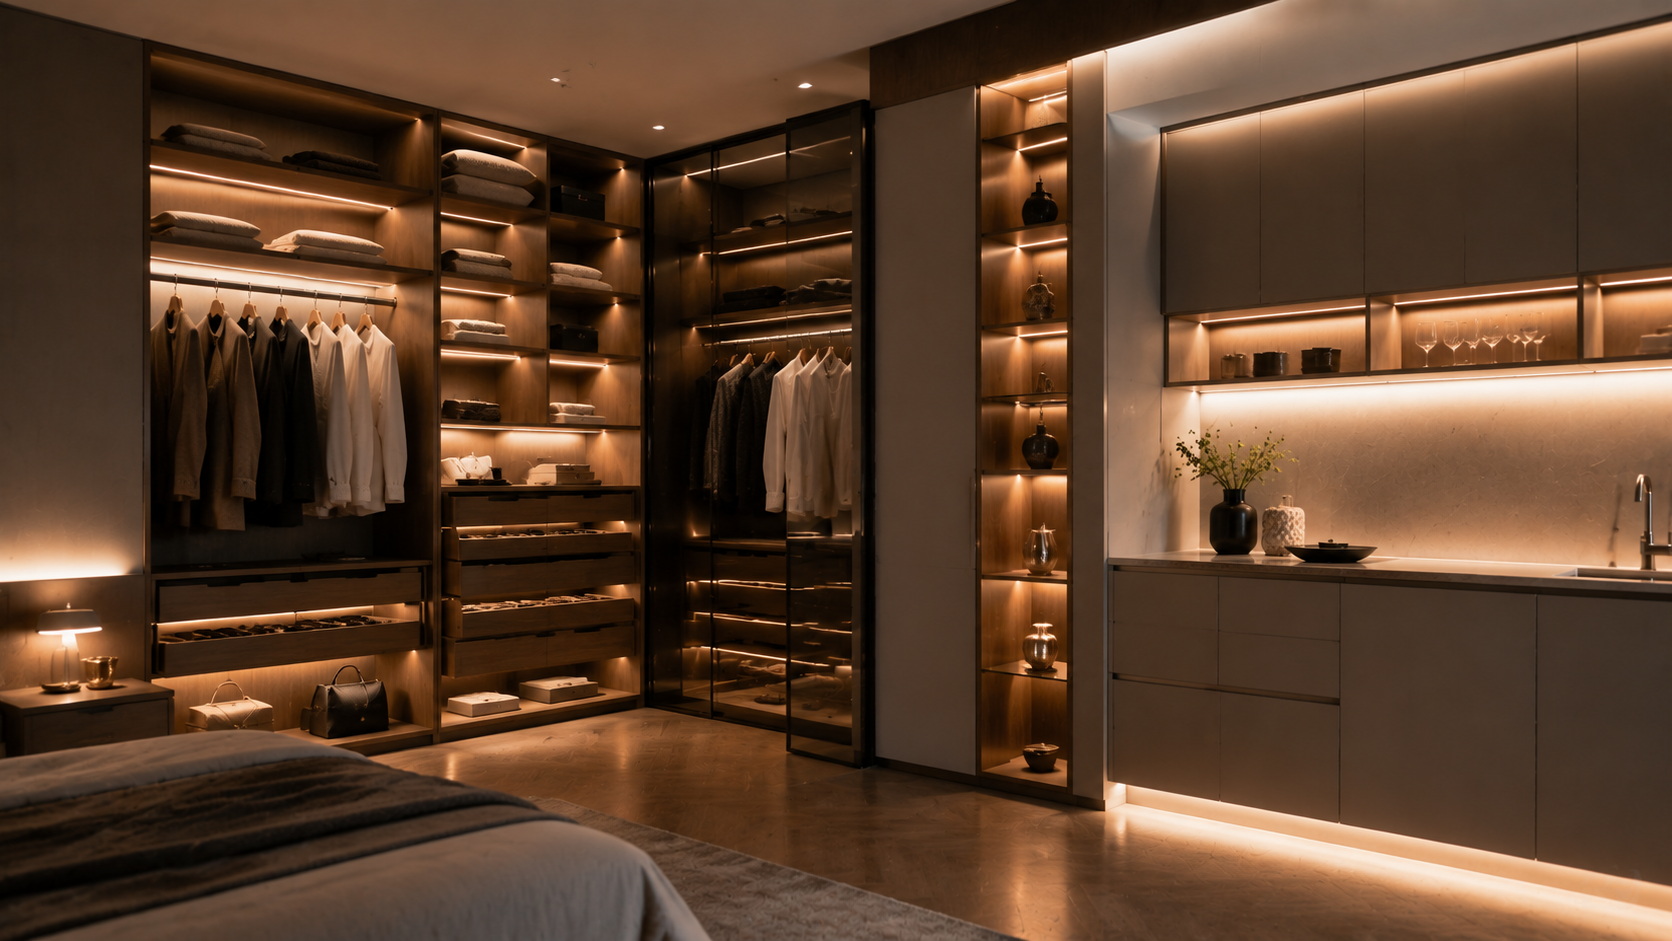
Tunable white LED strip lights allow users to adjust the white-light appearance from warm to cool tones. They are especially suitable for bedrooms, wardrobes, vanity areas, kitchen cabinets, hospitality interiors, and premium residential projects.
A common tunable-white strip uses one shared positive connection and separate channels for warm white and cool white. It requires a compatible CCT controller, dimmer, or specialized driver.
Power supply → CCT controller → tunable white LED strip
1. Connect the DC output from the LED power supply to the controller input.
2. Match positive and negative markings carefully.
3. Connect the controller output terminals to the matching strip terminals.
4. Confirm that warm-white and cool-white channels align correctly.
5. Test dimming and color-temperature adjustment before final mounting.
6. If the project includes several long zones, use parallel power distribution and compatible amplifiers where necessary.
DALI DT8 is designed to support advanced color control, including tunable-white control and multi-channel color-lighting applications. The DALI Alliance identifies DT8 color types for tunable white and RGBWAF control, allowing coordinated adjustment of color temperature and multiple color channels through compatible equipment.
Color-changing LED strips require a compatible controller. Unlike a single-color strip, each color channel must be connected to the correct controller output.
| LED Strip Type | Typical Use | Control Requirement |
|---|---|---|
| RGB LED strip | Decorative color lighting | RGB controller |
| RGBW LED strip | Color effects plus dedicated white light | RGBW controller |
| RGBCCT LED strip | Color effects plus warm-to-cool white lighting | RGBCCT controller |
| Addressable LED strip | Pixel effects and programmable scenes | Compatible digital controller |
An RGB LED strip commonly includes:
- One shared positive terminal.
- Red channel.
- Green channel.
- Blue channel.
Connect each strip terminal to the matching controller terminal. Do not assume wire colors are universal; always follow the printed connection labels on both the strip and controller.
RGBW adds a dedicated white-light channel. RGBCCT adds both warm-white and cool-white channels, allowing the system to produce decorative color effects as well as adjustable functional white light.
These systems are useful for:
- Display cabinets.
- Premium wardrobes.
- Hospitality furniture.
- Bathroom vanity lighting.
- Retail shelving.
- Smart-home scenes.
- Multi-function bedroom lighting.
For furniture lighting, RGBW and RGBCCT systems should be planned around the user's real needs. Decorative color modes can create atmosphere, but dedicated white channels are more suitable for daily tasks such as dressing, grooming, reading, and finding stored items.
An LED amplifier is used when the controller signal or output capacity is insufficient for a larger LED strip installation. It helps repeat the control signal to additional LED-strip sections while receiving power from an appropriate DC power source.
An amplifier does not replace correct power distribution. It should be treated as part of a complete system that includes adequate power capacity, proper cable sizing, and appropriate wiring layout.
- Multiple LED strip sections exceed the controller's supported load.
- Color performance becomes inconsistent across long RGB or CCT runs.
- A large cabinet system is divided into multiple remote lighting zones.
- A control signal must be extended to additional strip sections.
- A coordinated lighting effect is needed across several furniture modules.
- Connecting more LED load than the controller can handle.
- Using an amplifier without supplying it with adequate power.
- Mixing controllers and strips with incompatible wiring configurations.
- Extending one strip continuously across a large project.
- Hiding power supplies where they cannot be inspected or replaced.
- Installing control equipment in damp bathroom-cabinet zones without suitable protection.
- Ignoring ventilation around enclosed drivers.
Addressable LED strip lights, sometimes called digital, pixel, or SPI LED strips, can control individual LEDs or groups of LEDs. They are commonly used for feature walls, retail displays, entertainment furniture, gaming setups, architectural details, and programmable decorative installations.
Unlike standard RGB strips, addressable strips may include:
- Power positive.
- Ground or negative.
- Data.
- Optional clock.
- Optional backup data.
1. Confirm that the controller supports the strip's communication protocol.
2. Connect power positive and negative to the correct DC power source.
3. Connect controller ground to the strip ground.
4. Connect the controller data output to the strip data input.
5. Follow the direction arrows printed on the strip.
6. Add power injection for long runs when required.
7. Test the system before mounting it inside channels, silicone housings, or furniture panels.
Data direction is critical. If the controller is connected to the output end rather than the input end, the strip may not respond at all. DMX512 is a digital lighting-control protocol used for coordinated lighting systems and is maintained as ANSI E1.11; it is widely used where lighting fixtures require synchronized addressing, dimming, scenes, and effects.
LED lighting is often low voltage on the DC side, but the AC input side of the LED power supply can still require qualified installation. Follow local electrical codes and use a licensed electrician when the installation involves mains wiring, fixed building wiring, wet locations, commercial spaces, or complex control systems.
Before final commissioning, check the following:
- The LED strip voltage matches the power supply output.
- Positive and negative terminals are connected correctly.
- Total lighting load is within the power supply's usable capacity.
- Controllers, dimmers, and amplifiers are compatible with the strip type.
- Long strip runs use suitable power-feed points.
- Wires are protected from sharp edges, pinch points, heat, and moving furniture parts.
- Drivers have adequate ventilation.
- Bathroom cabinet installations use products suitable for the relevant environment.
- Connectors are secure and solder joints are insulated where applicable.
- All lighting zones operate evenly at full brightness and dimmed levels.
- Sensors respond correctly after cabinet doors, drawers, and panels are installed.
For long LED strip installations, a direct power connection to the start of each additional section helps preserve consistent voltage and brightness. Industry guidance also notes that higher-voltage systems can reduce current and improve performance over longer cable runs when the complete system is designed for that voltage.
Professional LED strip light wiring is not only about connecting wires. It is about designing a lighting system that is practical to install, easy to control, visually consistent, and dependable over time.
Farwise Technology Co., Ltd. provides integrated LED furniture-lighting solutions for cabinet, wardrobe, bathroom cabinet, bedroom, and commercial interior applications. Our product range includes LED silicone strip lights, cabinet lights, wardrobe lights, bathroom cabinet lights, LED power supplies, control accessories, and customized lighting solutions.
Whether you need a concealed cabinet-lighting system, touch-controlled wardrobe lighting, sensor-based drawer lighting, mirror lighting, tunable-white bedroom lighting, or a customized OEM/ODM solution, our team can support product selection, functional configuration, dimensional customization, appearance design, and complete system matching.
Contact Farwise Technology today to discuss your LED furniture-lighting project and receive a tailored OEM/ODM lighting solution for your market, design, and installation requirements.
Yes, provided that the power supply is compatible with the strip voltage and has enough capacity for the total connected load. For multiple sections, parallel wiring is often preferred because it helps maintain more consistent brightness across the installation.
The most likely cause is voltage drop. It can occur when the LED strip run is too long, the cable is too thin, the power feed is too far away, or too many sections are connected in one continuous chain. Add power-feed points, shorten the run, use parallel wiring, or redesign the system into separate zones.
No. Most LED strip lights require a compatible DC LED power supply between household AC electricity and the LED strip. Connecting a low-voltage strip directly to mains electricity can damage the product and create a serious safety hazard.
Yes. An RGB LED strip requires a compatible RGB controller to adjust red, green, and blue channels and create color effects. RGBW and RGBCCT strips need controllers designed for their specific number of channels.
RGBW LED strips combine RGB color lighting with a dedicated white channel. RGBCCT LED strips include RGB channels plus both warm-white and cool-white channels, allowing color effects and adjustable white-light color temperature in one system.
Use an LED amplifier when the controller cannot support the total connected LED-strip load or when larger installations need the same dimming, color, or color-temperature control across multiple zones. The amplifier must also receive adequate power.
Yes, but the product selection and installation method must suit the moisture exposure level. Use appropriately protected lighting products, keep power supplies and control devices in suitable locations, protect cable connections, and follow applicable electrical requirements.
Soldered connections are generally more durable for permanent or high-use installations when completed correctly. Connectors can speed up installation and are useful for modular or serviceable projects, but they must be selected carefully and installed securely to avoid loose contacts.
1. [SignliteLED — A Complete Guide on How to Wire LED Strip Lights]
2. [AspectLED — Low Voltage Lighting: The Electrician's Guide to LED Strips]
3. [DALI Alliance — DALI Colour Control]
4. [TRILUX — DALI Colour Control for RGB, RGBW and Tunable White]
5. [ENTTEC — What Is DMX512? Channels, Universes and Timing]
6. [ESTA / PLASA — Recommended Practice for DMX512]_ESTA.PDF)
7. [ECASA — A Guide to Strip Lighting for Electrical Contractors]


